by Susan Itell | Sep 23, 2018 | Blends, Embossing Folders, Thank You |

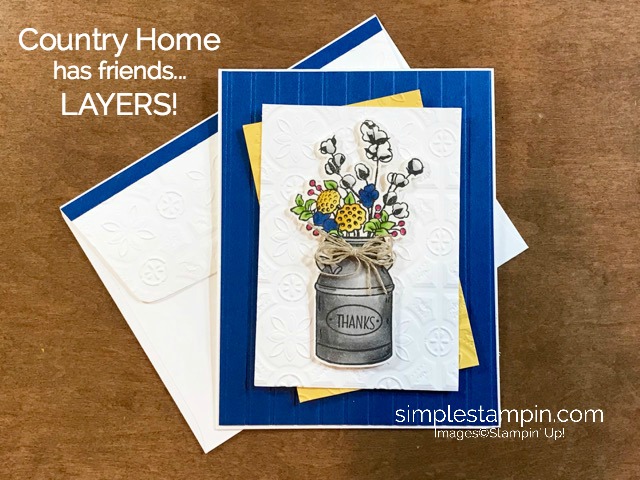
Good Morning and as promised I have another card for you featuring the Country Lane Photopolymer Stamp set….if you missed my other post with this, please click here for that inspiration. Today I have for you an example of just how adding layers of textures to make a fun, simple and classic card…. is easy to do with little effort!

I think when we go to our work space areas to create we get in the habit of using the same tools over and over and please do not get me wrong…that is truly OK and I am SOOOOOOO guilty of that but there are also many other tools that we have that can be used with our “old faithfuls” to make elements of our design….just that extra special something that will take your project up a level!
The textures that I am talking about are Embossing Folders!
My Embossing Folders are all snug in a container one a shelf in my work area. Because they are up on a shelf, I honestly just forget about them…therefore, they get skipped over many times. Embossing Folders (page 222 – 223) in the Annual Catalog and also several new offerings in the Holiday Catalog are the yummy Buttercream Icing on the cake!

WHY? – EASY…..with a simple pass through the Big Shot and just a piece of paper….out will come an amazing texture of goodness that will make a project go UP a notch instantly! For todays card, I am actually showing you (2) different embossing folders. The Simple Stripes and the Tin Tiled Textured Embossing Folder (this is a newbie in the Holiday Catalog). I know that many times we just use one Embossing Folder…but I ask you, have you ever tried 2 on a project?

I have some quick tips and tricks for you when using Embossing Folders and then I promise, we will get more into the card! You all know that it is always my goal to be able to share tips that I have found useful as heck – we are all in this crafting thing together and with that said – I say…HECK YES….the more tips always helps!
- When you use embossing folders…remember there are 2 sides (just like in life…there are 2 sides to every story) and sometimes you might like one better than the other……just like I did today…on the blueberry stripe one….I flipped over so the embossing strips are facing downwards.
- When you use a 3D Dynamic Embossing Folder like I used today for the Tin Textured (in white and daffodil delight)…you only need to use 1 plate in your “sandwich configuration” when you pass it through the embossing folder.
- I like to “mist the paper” with water when using many of the embossing folders….I suggest that you just have a mister bottle handy in your work area and play around with it. I always say that you need to play with products to get to know how they will work for you before you dive into a project….this way – you will always know the results before you get frustrated!!!
- Here is a tip and one that I know take time but trust me…it is well worth the effort. I would take cardstock (perhaps a color that you do not use a bunch) and make a sample of all of your embossing folders…hole punch it, label them and put it on a ring. I have done that and it is a great visual of what the folder will actually look like. To me, it is the same as I feel about seeing the Cardstock Swatches that I make…to have them in your hand is sooooo different than seeing pictures of what the embossing folders look like in the catalog!
- Stampin’ Up! has started to put lines on the bottom of some of the folders to give you a visual line to make sure that your paper is straight….this is a huge help for the images that if they come out crooked….YIKES.…we get grumpy!!!
- Run your embossing folders through the Big Shot with the crease of the folder in……not the open end….and lastly, the Stampin’ Up! logo should be facing up as it goes through the Big Shot.
Whew….thanks for hanging in there but I do hope that you found these tips helpful and if you have more tips and tricks that you have found to be helpful….please share in the comments as this IS HOW WE LEARN! I am a HUGE believer of sharing tips to make a process easier and I feel so blessed to have such an amazing community of Blog readers that always graciously share their tips and tricks!
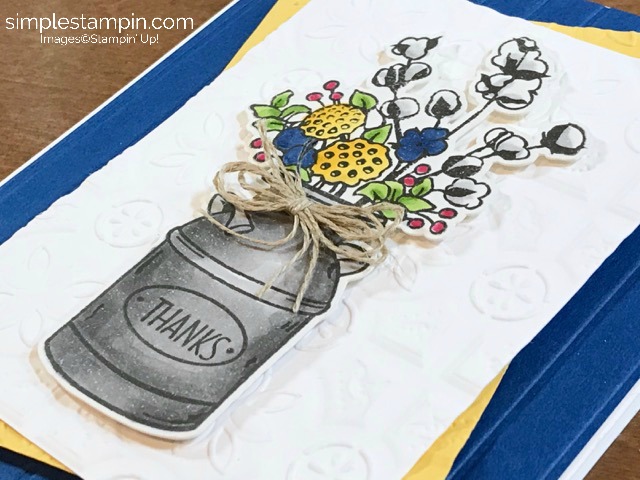
I just think that there is something super fun about this stamp set. I adore the fact that it is a Photopolymer Stamp as I find it so easy to look through….line up and stamp away! I did use the Stamparatus for this as I stamped many images at one time….I like a stamp positioner for doing this but I also like the fact that I can stamp it several times to get a good, deep and rich black image!

You will see that I cut it out…and I know…I know….it is a BUMMER that Stampin’ Up! did not make matching framelits for this keeper of a stamp set. You can easily fussy cut it out but I used my Scan -n – Cut to do the job for me today! Here is a tip when you fussy cut….thrown perfection OUT THE DOOR and just do it – trust me….no one will ever look at it and say – that is a terrible job!
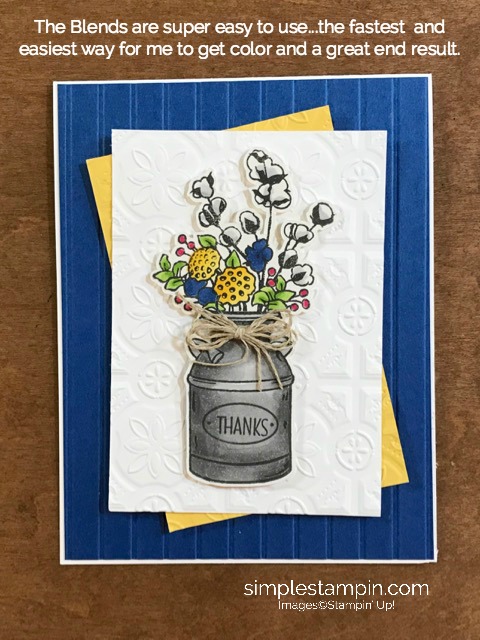
I used the Blends to color the image in and trust me again, they are the easiest and fastest way to color an image in. Being that they are alcohol markers…there are NO STREAKS in the end result! Please do NOT let the word BLEND get you flustered…they truly are the best. I also like to use the regular weight of Whisper White Card Stock when I use the blends….I just think that they absorb in the paper perfectly!
Today I tried something different and it worked PERFECTLY!!! Jeanie has always told me how much she loves and enjoys water-coloring on the Shimmery White Cardstock so today I thought I would give it a try and…..IT WORKS PERFECTLY! Always remember that you need to be sure that you that you use an ink that works with Alcohol Markers….the Memento does!
The Blends just glided on…just as it does what I used the regular weight Whisper White Cardstock….this is another product that you should have a pack of in your stash….it is a very subtle shimmer!!!

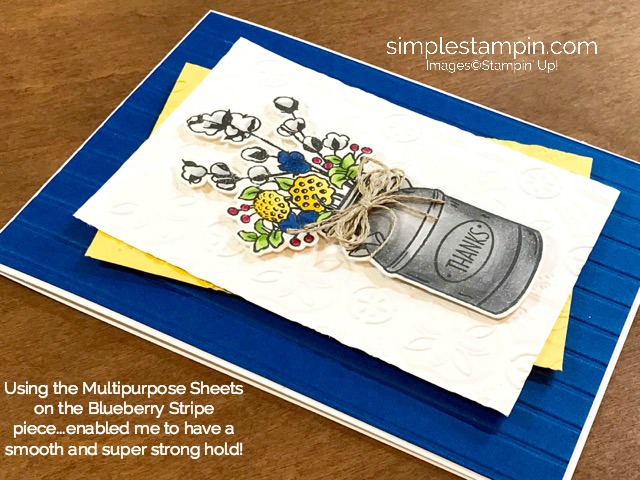
Below you can see that I commented in the picture that I used the Multipurpose Adhesive Sheets to layer the Striped piece down. YEP, I did as it lays perfectly flat leaving a very solid and professional feel to the card. Again, little tips for you! I adore this adhesive and a pack goes a LONG WAY…..to me, it is like that “little black dress” – you need to have a pack of this adhesive on your stash!

Below you will see the image of another tip….it truly is funny how the end result looks so different on different cardstocks! I know that I will easily use these for another project in the future….just wanted to share with you how I roll when I design!

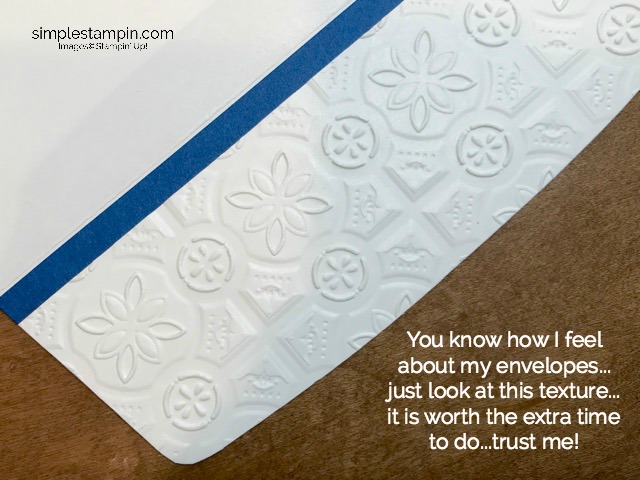
A close up and sorry, not the best quality of a photo below but I think you get the message. Just look at this love!!! Envelope love is the best way to end a project that you made with your own hands!!! Once you start doing your envelopes…..you will never send a card out with some sort of envelope love! It is also a great way to use up scraps!

Well….there you go…..another bit of inspiration from me! I hope that you enjoy the remainder of the weekend and I hope that you can turn the football games on today and craft away! That is what I am planning to do…..I am trying to get a JUMP START on Halloween Treats that I love to send to family and friends!
I will be traveling a bunch over the next month so I am trying to get my DUCKS IN A ROW (as the saying goes) and I will be sure to share with you some fun and easy ideas of what I will be making…..I am not a huge Halloween person but I sure do love to send fun, festive, and yummy treats of love made with my hands!
I sure do love this fun things that we do…..handmade love is just the BEST!

by Susan Itell | Sep 19, 2018 | Blends, Fall Cards, Thinking of you |

HHD and boy do I have a super fun card for you today! I said that today I would be showing you how you can take scraps of Designer Series Paper and make an AMAZING CARD from truly MINIMAL product!
I know that many of you will “get it”...you know…the feeling inside when you create something and at the end of your “playtime with paper”….you are smiling a bit bigger and feeling pretty darn good? Well, that is how I felt at the end of making todays card!
It probably was at least 3 years ago I made a similar card using this layout but I could not find it when searching back through my posts. I am sure it was eons before I had switched over to Word Press…but I was just tickled that I found the video that inspired me with this great technique in using up those scraps!
I am not sure if you are familiar with Gina K Designs. Gina K has been around for years in both the card-making and scrapbooking industry and she is also the host of Stamp TV. Gina has, just like Stampin’ Up! the amazing ability to have super inks and papers that always match…and I find her videos very helpful when trying to learn a new technique.
If you click here, you will see the video that Gina did for todays inspiration. Now….let me condense it for you and share a tip that will make you squeal so loud….that Daisy would think she has competition!
I am working with the 2 stamp sets below….Country Lane and Rooted in Nature! Both of them are just wonderful and I love the fact that you can get so much more mileage from them as the fonts are just about the same…. working super between them. On Friday, I hope that you will pop back to see another inspiration that I have for you with these 2 stamp sets!

Just like I did last week…I am inspiring you to use up those scraps that I know WE ALL HAVE! This example uses 1/2″ strips of paper from the Country Lane DSP Collection. You can easily mix and match from all of your stash but this just seemed to come together – a peanut butter and jelly combo! (I love that when this happens)…
I love the fact that our DSP have a bold and POP side and usually one that is more fitting to a season…and then the flip side – usually a smaller and more subtle print that you can use all year long. Stampin’ Up! truly does their paper amazingly.

Let’s get to the tips for this super cute card. I think that you will agree with me…this card just as it is could be suitable for many themes…from birthday…to thinking of you….to Thanksgiving etc…. For today’s card, I did use the Stampin’ Blends for the simple coloring of this card. I have listed at the end of the post the colors that I used and I did not do anything fancy whatsoever. The blends just glide over the paper making it effortless to color.
I truly wish that Stampin’ Up! would have a CLICK OF A BUTTON that groups all of the collection that they have thus far for newbies to do that thing we love to do….HIT IT and just get them all! I think that the reason they do not have that as an option is that they are adding more colors….just like they did for the Holiday Catalog.
You can CLICK HERE to see the offering that we have thus far…..when first getting a new color, I would suggest that you get the combo….do not get hung up on the word light and dar….just think of them as 2 different colors as that is exactly what they are…I say get comfortable with them and then you can learn more….

I was planning on using one of the yellow patterns from that DSP collection but then when I saw that I could use (3) different papers with the same color scheme….(Blackberry Bliss)….I thought – PERFECT…..the back drip will have a monochromatic feel and then the images will even POP more….and you know what it WORKED!
I have a BUNCH of pictures for you today and please feel free to ask a question in the comments if you need clarity. It truly is SUPER EASY and FUN….there is no right or wrong way to place your papers….but I would recommend your 1st strip be in the upper right corner and then work from there. If you watch the video…you will see a great visual demo!

The one thing that I was super happy that I thought of was to cover the base with a piece of Multipurpose Sheet and then it would be EASY to place the strips of paper…..yep it was….but one thing that I did not think of….the adhesive would be sticky in between the strips!
I admit, I frowned as I thought that this was a PERFECT solution to using a glue or a snail tape runner etc….and before I started from scratch again….I thought …..
Take the EMBOSSING BUDDY and rub it over….and IT WORKED!!!!
In the below picture you will see how the beautiful backdrop came together and then you can see the other components that brought this together! I invite you to look at this…..break it down and then you can see that this is not only fun and a bit different….it is a very clean card with super fun lines!
One of my favorite new colors/neutrals in the Stampin’ Up! line is Gray Granite…it works wonderfully with so many different color combos…from the brights to the deeper tones. I matted each of the below elements with it and I think you will agree….it makes a difference.

If you already follow my blog than you already know….I truly believe in the basics! This little hobby that we do is wonderful…it is so special in so many ways and it also is a hobby that creates a WIN-WIN for both YOU (the person making the card) and then they recipient (the feeling they get when they see the time and love you put into it)
With that said….use the basics…buy the tools and products that will help you complete the projects that you like to make. I think it is fair to say….we all have a bunch of stamps and trust me, I am SOOOOOO guilty as well – I have many stamps that have never been inked up but the one thing I can say is… I do have are the basics….
When you see the below picture you can see some of them that I am talking about….the glue dots…the linen thread….the Blends…the multi-purpose adhesive sheets – you see, when they are assessable to you….things just go easier!

Can you see how “well behaved” the linen thread is? Yep, a trick that I have shared many times with you….I use bees-wax from the fabric store (it is pictured in the above photo) I buy that at JoAnn Fabric but you can get it just about any where! Again, another exable of having the right basics will back your final project shine!


Let’s get to one of my favorites…the envelope! I decided to attempt to do a similar pattern for the back flap. It was super easy and I was thrilled with the end result…what do you think? I am super excited to do one with fun and festive Christmas Colors….won’t that be fun!?!?
If you have questions about the adhesive release sheets…..PLEASE ASK…..please do not feel that there could possibly be a silly question. Trust me, I am the queen on asking silly questions….just ask my kids! Leave a comment and I will do my best to answer it but I am also sure that there will be many others that will chime in. I just love the community of you guys that follow my blog!


There you go….are you thinking that this might be too hard for you to do? If so…..I say NO WAY…..just try it – you will be SHOCKED with how little of DSP that you will use….so try it….you will like it!
If you do not have the adhesive sheets that I used…that’s ok – just use whatever adhesive that you have but I will say that using these makes it SOOOO easy…..and the dusting of the “powder bag” – PERFECT – all of the STICK GOES AWAY but the bright white is still there!
I will see you on Friday with more inspiration using these 2 great stamp sets…..just trying to be practical for you….have a great evening!!!
by Susan Itell | Jul 13, 2018 | Blends, Thank You |

Woot-Woot….it is the weekend and I have a cutie for you today and guess what? This layout is one of those “formula types” that I love and try to encourage you to make! WHY? Well, there are a bunch of reasons but the one that comes to mind instantly is…they make card making super easy as all you have to do is find the formula…and adjust your stamp and color combination to whatever stamp set you are working with!
Easy and DONE! As I have blogged…I have become very picky about my purchases as let’s face it….there are soooooo many amazing crafting products out there…… that we just cannot have it all so my shopping the new catalog was very selective!
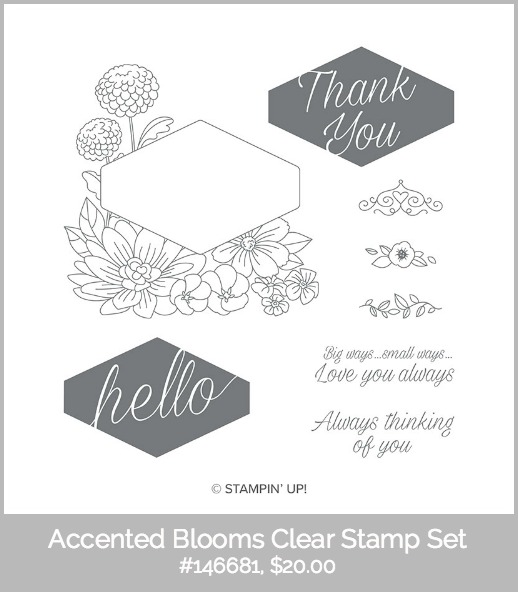
This stamp set, Accented Blooms is a keeper. I knew the minute I saw it….it would be living on Randall Lane. WHY? Well…..H E L L O….Look at that image…look at that FUN and LARGE “hello and thank you”….look at the sweet sentiments….the price is right and lastly – you see those 2 little stamps – the leaf and the flower….well I have an idea for them! (I think that it will make you smile!!!)
Today I used the Blends to color the image. Blends are the quickest method of coloring for me to do in a jif and when I made this card…I made 6 of them so I simply stamped the images out using the Stamparatus and then colored the image in when I was watching a show that I am kinda hooked on, Shark Tank!
I admit that it drives me kinda bonkers that there is just not one simple click of a button to get the blends….and/or a button to get the new ones that were just released. Oh well….(got that off my chest) – I am asked time and time again….what colors of Blends do I need…and I hold true to my answer – ALL OF THEM!
Hang tight here…..I know that you are thinking – WOW…they are expensive…and YEP, they are an investment but I was asked and I gave my opinion. The reason I say this is…it is such a hard decision to narrow it down as it all depends on the image you are coloring. One thing I will say FOR SURE is….if you are ordering them here and there….always order the combo pack (Blends are on page 205) as you really want the light and the dark of each color.

Now HOLD ON…..I am sure that many of you are thinking …I do not know how to blend!?!? Please do not think of them in this way as true…they DO have the ability to blend seamlessly but think of them just like they sound a LIGHT and a DARK….so…(2) markers in the same family but one is lighter than the other.
The moral of this story is (look at the leaf part of this card)…you cannot go wrong with putting the light color down first (light Granny Apple Green) and then where you have the lines that are on the stamp go over it with the dark one (dark Granny Apple Green) and then guess what? – YOU DID IT….as you become more and more comfortable you will begin to “be that turtle sticking your head out” and experiment with “blending” but we are not even going to go there today!
I always forget to mention this…you know that I am a BIG FAN of the Thick White Card Stock and yep, I do use that for all of my card bases but when I am using the Blends, I prefer to use the Regular White Card Stock to stamp the image on that I am coloring. I think that the thinner weight of the paper takes the markers easier and remember, the bleeding through the back of the paper is TOTALLY OK – that is what happens with alcohol based markers like the Blends are!
Whew…enough jabbering….let’s get to it! I know…I know – I am way too wordy but I am what I am! It is always my goal/intention to make sure you understand and feel comfortable with products. Trust me, I get it as we all learn from trial and error and as anything in life…it takes practice, practice and then more practice! That is exactly why I made so many of these sweet cards….I knew that the more I played with coloring this image, the more likely I would feel comfortable and have a great project!
Click on the below image to take you to all of the offerings!

As always, at the end of my post you will see the line-up of products that I used for the card. I want to remind you about the Buy 3, get 1 Free Designer Series Paper Sale that is going on for the month of July. This DSP that I used for todays card is from the Animal Expedition Paper. Great deal to stack up on the new paper….an instant $11.00 savings!
I love this pattern as it is very versatile but I was also excited to show you a practical card using this DSP Collection. Many at 1st glance think that this is a juvenile/kiddo paper…but as we all know….there are 2 sides to every paper! (ha-ha) I love it that one side is whimsical and then other…a fun clean and classic print!

Here are the dimensions for todays card. As I say with the formulas….I would make the time to make up a card using this formula even if you do not have this specific stamp….true you might need to tweak the measurements to adjust to whatever stamp you are using….but this way you will have PRACTICE (remember that IS that little thing that we need to do in life) and also write down the dimensions you used so you can quickly refer to it in the future!

Without further yada….yada…..

There you go my wonderful cyber friends! I do hope that this made you smile….made you look at the fact that it is TOTALLY OK to use your DSP to cover the whole front of a card and then PRESTO…with layers of paper and the texture from the Embossing Folder…BINGO…you have one beautiful card!
Below is this embossing folder! You will be seeing me use it a bunch this catalog…My guess is that many of you BREEZED right by it in the catalog. Please do not overlook the effect a simple embossing folder can give you. They so affordable and make a big impact!

If you are new to my Blog, 1st…WELCOME….but I also do invite you to check out my very generous rewards program that I offer when you place an order with me. Remember…..I too was a customer and I totally “get it” when you have opportunities to get a FREE STAMP! Those 2 words make my heart pitter-patter every time….FREE STAMP!!!!
Have a wonderful weekend and please feel free to email me and leave a comment sharing how you like this formula…..I KNOW YOU ALL HAVE THE DSP……no more hoarding…pull it out and USE IT UP!!! 🙂

by Susan Itell | Jun 29, 2018 | Blends, Fun & Cute!, Super Easy, Thank You |

Happy Friday! I am sure that many are going to be getting a head start on the upcoming Holiday with it being a “Hump Day Holiday” next week…not us though – we are home for the weekend babysitting the “grand-dogs” and cleaning out the barn! My job is power washing and John’s is to cob-web and get rid of the barn swallows!
I am sure that you have HEARD THE NEWS……..as it has been on every blog I subscribe to…..
THE NEW BLENDS ARE IN STOCK!!!
Yep, it’s true and yep….I know many people are super happy…..soooooo happy that their hips and legs probably sore and stiff from doing the HAPPY DANCE that we tend to do…..(my pups look at me like I am nuts!!!!). I have done my cyber share therapy and they are on order ready to roll down Randall Lane!
Let’s chat about this SUPER -DE-DUPER sweet card that I have for you today! I think it is just adorable and one that I knew the minute I saw this image in the new catalog…I new it was coming to live with me! It is called the Bee Thankful Stamp and it is a single stamp (which means the price point is super…) and it can be found on page 125.

I knew that I was going to be using this gem over and over as there is something so special about many of the single Stampin’ Up! Stamps….they are usually chocked full of FUN and with some simple touches, BAM – you have a keeper! When I look at some of the retired stamps that I still have because I love them so much….many are a single stamp – Vivid Vases, Bearing Gifts (love that Polar Bear), Watercolor Than You, Get Well Soup, It the Broom Fits….yep, I do like them!
I used the Stampin’ Blends that have been out since last Fall but you bet that I am just itchin’ to give the newbies a spin! We all seem to love the new Color ReVamp and I think that the 11 new Stampin’ Blends are a PERFECT fit to the line that we already have! You will see the whole line up at the end of the post.
Today I used the Night of Navy, Rich Razzelberry, Old Olive and the Light Crumb Cake Blends to color the image. Are you wondering what I did for the BEE? Well….I thought that the Daffodil Delight was a bit off….and because I do not have the Pineapple Punch Blends yet….I pulled out the Aqua Painter and dabbed a wee bit of the ink from the matching stamp pad….it will work just fine for a small area…

Making this card was super fast as I used the Stamparatus. If you have not used the Stamparatus or for that fact, any other Stamp Positioning/Alignment Tool….than this is simple….YOU NEED TO DO SOME CYBER RETAIL THERAPY! It makes stamping and lining up soooooo much easier and if you are one that loves to mass produce cards – you’ll be doing the happy dance and this is a dream for that!
The strip of Whisper White is 2 3/4″ wide so I just went ahead and stamped (12) of these images and then I will have them ready for the future to color in. I am one that likes to take things on the go with me….so having a bunch already stamped is a fun project to do later! With this stamp, the sky is the limit with how you can color it.

I did a super quick job coloring this image and I also went outside of the lines…..now stampers…..PLEASE HEAR ME LOUD AND CLEAR!
It’s OK to “oops”….. It’s OK to go out of the lines….
First – it is A CARD….and second – IF YOU THINK THE SKY IS FALLING…well there are ways to fix it. I simply took the colored image back into the Stamparatus and RE-STAMPED IT IN BLACK….you see….another great reason to have the Stamparatus as you can easily go back and stamp a darker line of ink!
For this…I chose to sprinkle Clear Embossing Powder over the Black Ink when it was still wet and then heat set it with the Heat Tool! Not only does it help to hide my boo-boo’s….but it gives a very finished and just FUN look of a shiny black embossing with the pop of colors from the Blends!

This card is just so darn cute and so darn simple to make that you really do not need me but I know that you enjoy the tips and tricks that I give you for your card making fun! I totally believe that we do learn from one another! How about this super fun polka dot paper…..it makes me smile and it makes me smile even more as we now have a FUN POLKA DOT PAPER in each and every color of paper that we have!
YEP, that is one my most favorite things that Stampin’ Up! has done with this new catalog. You will find ALL OF THE COLOR FAMILIES on page 191 of the catalog…..and if you want to get a SAMPLING of THEM ALL….tomorrow is the LAST DAY for my Product Share offering!
Share #3 is what you would want for these DSP Paper Stacks. This way you will have the whole spectrum of the new Color ReVamp without having to break your “Daisy Bank” (tee-hee-hee)…this addition of paper makes a clean and simple designer like me super happy as we will always have something to match up with!

Below you will see a cheat sheet in how I can save the DSP….heck, we will take every bit we can! By cutting it into 1″ strips I was able to do the card and the envelope with one piece of paper and I still have another 2″ piece that I can use for another project or envelope!
You know that I use fun foam a bunch….and honestly I looked it up for someone last week as I do usually get it on Amazon. I have a big container of scraps and it gets used up just like we use every bit of scraps on the Stampin’ Dimensionals! I do adhere it with Fast Fuse (as I still have some) but I would recommend that you could use tear n tape or even green glue will work! I personally love the feel of the card when it is in your hand with the fun foam…..

Well…as the saying goes…THAT’S ALL FOLKS! I hope that I made you smile…and I hope that I inspired you to be gentle to yourself with perfection! To me, the most important part is…YOU MADE IT! That in itself is a true blue gift and one that has no price tag on it.
Please do not forget to EMAIL ME if you want to take part in the final Product Share from the NEW Annual Catalog. Shares are a great way to get the newbies without the expenses.

Have a fabulous weekend and stay safe if you are diving and also hydrated if you are out in the heat….last weekend John overdid it a bit with the heat and WOW – it really gets you! Water, Water and MORE WATER!
Many thanks to many that sent me an email asking if I was near the Maryland shooting yesterday. No, we live about 2 hours away but Jeanie and I were just there on Wednesday to see 2 other Top Dogs….they both are from Annapolis (Ramsey and Jill) and they are fine but it is sad, super sad. Our wonderful country has had way too many of these senseless shootings…..
Monday starts the DSP Paper Sale…..you can click here to see the post that I did about that and this is one more reason why taking advantage of the Product Share (share #2 for the 10 different DSP offerings) is a win-win for you as then you will be able to see if you want to take advantage of the buy 3 get 1 free of full packs!
I know that the below line up looks HUGE….but it is because the blends – it would be soooooo much easier if there was just one button to click and POOF – they are are there! I am very thankful that the newbies of Blends are here! See you Monday and I hope that each and everyone of you have a special weekend!
by Susan Itell | Jun 19, 2018 | Blends, Bundles, Just Because... |

Happy Tuesday to you and I admit….I was fearful that I was going to forget how to blog!!! I think that this is the absolute longest that I have gone from blogging but please do not think that I have not been busy…as the Product Share Orders kept me full time each day and they are all complete and OUT THE DOOR! (whew, a great feeling !!!)
Life on Randall Lane has been busy and I feel like there are sooooooo many “funnies” to share with you and I will on another day as I think you will laugh….BIG TIME with some of the shenanigans that have been going on with the critters! Poor Daisy Mae…she is a grumpy piggy with the heat and my family thinks I spoil her with air conditioning….heck I say – a girl has to do what a girl needs to do! I promise I will share as I know you enjoy my animal stories!
Today I have for you a card that I think is going to make you smile, well at least I hope so! When I am woking on Product Shares, I get to know the new products really well! I watch sooooo many videos while cutting and sorting! It is funny, products that I did not give much emphasis to clearly make me look at it differently and this bundle is one that perked my interest…the Serene Garden Bundle.

You have heard me blog about this before but here it is again…I adore looking at the catalog for inspiration as the amazing pictures of projects in the catalog will make you have a “spring board” to start your creative juices to flow! (page 166) I think the thing that intrigued me about attempting to make todays card was the Pool Party pop of color around the stamped image.
The coloring on this card was all done with the Stampin’ Blends. They make coloring a breeze. One question I am asked many times is…what colors do I need? Hang tight as you might think I am being over board on this one but here you go….YOU NEED THEM ALL! Yep, you heard me…you need them all as I just cannot imagine sitting down to work on a project and being limited to waht you can do and what you cannot do because of the color options!
The Blends (page page 205) are an alcohol based marker that makes coloring as fun as the day when you were a “grasshopper” and got the new box of Crayola Crayons (now THIS IS a great memory as getting a new box felt like you hit the jackpot). They come in a light and a dark but I would just look at the column on the right and purchase them as a combo pack as you DO WANT both the light and dark of each coloring offering!
WHY DID THEY DO THIS LIKE THIS??? Easy….you will see that you will gravitate and use certain colors more than others, just like we do with our cardstock and stamps that we use. The great thing is that YOU WILL be able to purchase just what you need in case you have to reorder on one Blend….not having to get it as a set.
Using an alcohol based marker allows you to color without marker streaks and here is a myth…as many of you think that you need to understand the whole blending and shading scoop…NOPE – you can get GREAT results without knowing any of this stuff! I did all of this with straight forward putting the Blend to the paper! Once you get comfy with the Blends, then you can experiment with shading etc….

There is SOOOOOO much to chat about this new catalog and darn it, I wish that we all lived in the same town so we could chat in person (the reality is…our families would NEVER see us cause’ we would have a BIG OLD TIME together) But for me, a NEW CATALOG takes time to settle in and get to know! I am looking so forward to sharing you things that I love in a clean and simple way!
One thing that is FOR SURE is…
Stampin’ Up! ROCKS IT with DSP and the color coordination across the entire product line!
I am just goo-goo over the Garden Impressions DSP Stack! It is just over the top beautiful and truth be told, I am drawn more to the flip side of this paper that I am using today but I wanted to stretch my comfort zone and use this side…and I learned a lesson – I loved the end result!!! When I showed my best critic (my sweet hubby John) he smiled and said – this is great and what makes it is that background! (and then I smiled)

I often like to cover the entire panel of a card front. To me, it makes an instant impact. Speaking of impact…the new color of Gray Granite is my new favorite Neutral! I invite you to play with this color as it is one that makes a subtle project rock, a bold project rock etc…I did a wee mat of it around the focal portion of the card today! Just a little goes a long way and IT’S WORTH IT!
You just cannot go wrong with paper…I love to layer, I love to pop up – taking that extra step, taking that extra time will clearly show up in the end result. I like to look at layering as an accessory…just like when we dress ourselves, a scarf can make a fun outfit a wow outfit…just like paper does with our card designs!
Speaking of extra touches…how about this Linen Thread? It’s like a crisp white blouse in your closet…you ALWAYS need this! I love to wrapped several strands of the Linen Thread around when I create as I think the texture and effect makes a difference.
I like to run my Linen Thread (and also I do this with Bakers Twine) through a Bees Wax thingie???? (I have linked it for you from Jo Ann’s Fabric) but I am sure you can get them many places….I might be creative but I cannot sew worth a lick! I do this because it make the thin stands “behave and make a perfect bow with both texture and substance” I secure my bows with a simple glue dot – works every time!

The sentiment….super cute, right?!?! The font is right up my alley and this is from the amazing bundle, Varied Vases! I wish that Stampin’ Up! would share with us what products are on the tops but I would wagger to say that this one…has to be in the top 3! It is super special as not only is is a clean and oh so versatile bundle but the price point is perfect!
I know that you all have seen many amazing projects with this set and it is one that will be a classic through the test of time! Perfect for all occasions…and paper piecing….one of my favorite techniques to do (watch for future posts with this technique). I am also super “family proud” as this bundle was created by my upline, Mary Fish for becoming a million dollar SU seller….you can see her clean and classic style! I guess I could say, I’m proud of my SU Mama!

I simply took a 1/2″ piece of Calypso Coral cardstock and heat embossed it with white embossing powder. This IS a technique that I never get tired of as the WOW comes back to you just as it was the first time you did it! This is funny….I can remember that after I purchased the Heat Tool I could hardly wait for John to get home to show him the magic! (kinda silly that as an adult things like this makes us feel giddy)
The 2 most important tips I can give you for great Heat Embossing results are….get the Heat Tool good and hot before you bring it to the project to set…and you DO NEED the embossing buddy…this helps with stray pieces of embossing powder to your area that you are heat setting. Both of these products are a one time investment!
I often get emails about how do I get the embossing powder off of my darker cardstock after heat embossing. Here you go – I keep Swifter Clothes in my work area and use them often! (You can get them at any Grocery Store but I linked you to Amazon for convenience) and I cut them into smaller sizes and use them for many things….cleaning off the white reside from the embossing buddy…removing any excess embossing powder that is on my work area etc….
I love the look of white embossing on a color cardstock…clean and classic!

Speaking of things I love…I love my envelopes!
This is something that I do with each and every card I send out… to me, it is all about first impressions and when you receive a card in the mail and see some envelope love to it….I know what happens, you smile! Trust me, I “get it” as I am the same way and it is funny that when John brings the mail in and sees that I have some “happy mail” from someone….he will SPOT OUT THE ENVELOPE and say….this will make you smile – it’s a pretty envelope!
With this card today I wasn’t feeling the love to put this DSP on the outer flap like I usually do so I thought – make your own envelope in Pool Party to pull it all together! This IS a great example of envelope love! There is an instant WOW with a colorful envelope and making one with the envelope punch board is a cinch. (you have heard me say this….but this IS the best piece of plastic you can buy for $20.00)
It just took an 8″ X 8″ square of cardstock to create this smile! For those of you that like to make square cards like I do…you can easily whip up any size using the trusty guide on the front.
Are you hanging in there???? I am sorry that my posts are so darn long but I cannot help it sometimes – it is always my goal to inspire you and help you “see where I am coming from” with my projects! Remember, it’s ME…..SIMPLE SUSAN so I do not showcase anything that I do not like personally and I am just who I am with my style of blogging!
I am sooooo happy that many of you enjoyed the Blog Post of how I organize my Cardstock….I am going to pop in there today and respond to your comments! Being organized just makes this whole process of this “addiction we have” so much more enjoyable and it also allows us not to over buy.
The next post I am going to do is how I organize my Designer Series Paper! Trust me, you will be SHOCKED with how little room it takes up and I have every offering that Stampin’ Up! has! It is all about the process and all about having the right products!
Enjoy the day and I am sooooo hoping to have more “me time” today in my studio! I just wanna play with the new kids on the block! All of the products that I used to create this sweet card will be found below!!! See you soon!