
Well…did I get you with the subject line? Yep, I preformed some “SS” (Stampin’ Surgery) with my trusty scissors to break up this foursome. I admit I was feeling a bit guilty as my eyes looked at their smiling faces but after the first cut …I knew I had to keep going!
I am sure that many of you are gasping and say….I could (or probably would say would) never cut up my stamps….and I get it (in a way) but when you can get more mileage out of a stamp I say….why not ….GO FOR IT!
I am on a Leaders Group where Stampin’ Up! Demonstrators share thoughts and ideas….and this is where I saw this idea. I immediately when to this stamp (and the 4 critters were screaming) …pulled out my trusty scissors…..put a good light onto the foursome and went to town right on my workspace! DONE – I now have 4 stamps but if I still want to stamp them together….no worries – just push together!!!


This stamp set, We Must Celebrate is in the Occasions catalog. I blogged using this sweet stamp earlier (click here) and I loved it then….and again, I love it today! What do you think? It is super cute and it can be paired with so many sentiments that I think you can see the mileage you will get from it!
Here is another tip that is great about this stamp…look at the little “filler” stamps as I like to call them…the confetti and the little leaf are both great additions to tuck and add here and there with projects. To me, fillers are the little extra touch that makes projects “twinkle” and make that lasting impression!
You can see with the product line up that this sweet card came together with 3 different stamp sets. I wanted to encourage you to look at what you have and use it in a different way. For example, the Heart Happiness stamp is a very classic and useful stamp as we know that a “heart” is a classic that can be used all year long but the minute I saw the 6 little hearts….BAM – I knew that they would be used just like I did today….floating up!

Let’s get to the real scoop and the tips and tricks that I did to make todays inspiration for you. I used a technique that I know seems a bit scary but actually it really is not – I simply masked the bear and raccoon. You know what I am going to say to YOU….
YEP, you need to practice…you just need to try!!!
When I mask I prefer to use a masking paper but you can easily use a simple post it note. The reason that I use a masking paper is that this paper can be used several times and I simply tuck the mask in my stamp set so if I want to do it in the future, my mask is ready to go.

If you are using a post it note…make sure that when you stamp the image…you are stamping on a part of where the “sticky is” as this is how it will hold tight when you “mask” and stamp the next image!
Below you will see a picture of the image sheet of the Stamp-a-ma-Jig….and yep, it is a critical part of making precision for adding my fellows! Because I used the “jig” I am able to see and tilt the critters to exactly where I want the next one to go. I think “tilting them a bit” adds a fun element.

I can hear many of you are sighing about the “jig” but it IS one of those basics that every stamper needs to have. I know that we do not use it a bunch but trust me, when you need it…it is not only a time saver…it is a frustration saver as with this simple piece of plastic…you can get PERFECT placement every time!
The coloring was a cinch with the Stampin’ Blends…these alcohol based markers make coloring FUN and don’t let that would “BLEND” get you in an uproar….you DO NOT have to blend when using them…just color if that is a comfort level to you….and if you want to blend…great – no rules…just do what YOU are comfortable with.

The best parts about these markers are that they color without streaks making simple coloring a rewarding experience and the other thing…they match our color palette perfectly, something that Stampin’ Up! does brilliantly! Make sure that when you use these that you are color over another piece of paper as the natural “bleed through” is a natural process of an alcohol marker!
Sentiment time…..where did this come from???? The Happiest of Days…which is in the good old Annual Catalog! I don’t know about you but….there are times (actually many times) that I feel bad for the Annual Catalog…..we all get soooooooo excited for it….it gets revealed to only have the Holiday Catalog steals its thunder and then the Occasion Catalog doing the same….remember – look in your stash and use what you have!
I have showcased this stamp set many time….click here and then click here….both some of my all time favorite cards…the simplicity of the open designs of this stamp make is great to create! Also…..the “jig” helped me make the placement perfect. (I know…many of you do not like this tool…but it really is not a bad guy)

A fun card like this can use a bold DSP to make the envelope shine. This is from the Tutti-fruitti DSP Stack, a fun and colorful pack! I admit, the picture does not do this pack justice as I think it appears super busy…but when you look at the paper (singularly) there are some fabulous finds….definitely a go to for my style of card making.


I hope that this post makes the start of your week with a beautiful smile on your face! I was super happy with it and I do encourage you to try your hand with masking. We all have sooooooo many stamps in our stash to mask with.
I will see you on Wednesday with another coloring fun project that I have been working on…..speaking of coloring – tomorrow I am having some “coloring therapy” with a dear friend that is on my team and we are doing some “continuing education” (I like the way that sounds…and John laughed when I told him) as we are going to a Copic Coloring Class. We can never stop learning and crafting…right????
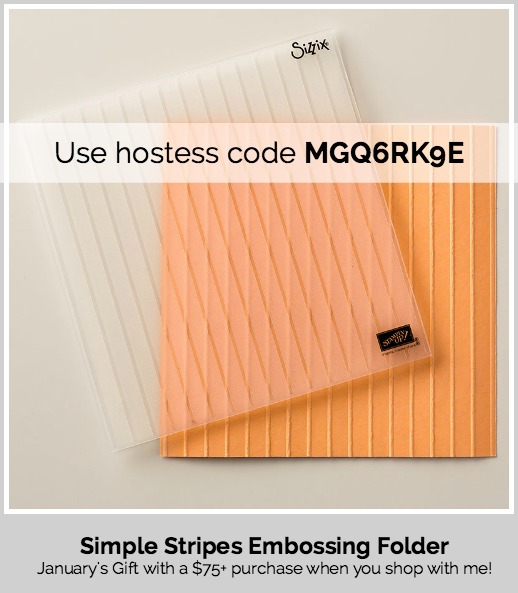
I would love to send you this card and also this embossing folder…..they are my thank you gift for when you order with me this month. My current hostess code can always be found on the right side of my blog…but here you go to copy and paste – MGQ6RK9E….and please remember, I offer a very generous (well I think so) rewards program for shopping with me – it is a joy for me to send you freebies as heck – we all love a gift!


I don’t cut many stamps apart but I’m with you, if you want the original you just push them together one the block. I saw the same post you saw about cutting them up. I thought I must do that! But then I’m using that stamp for a class next month so maybe I should wait? Or maybe that will show people how versatile it is. Anyway, this card is a cutie and I’m glad to hear that the surgery wasn’t on you or one of your peeps or your furry family (which includes Daisy even though I’m not really sure pigs are what you’d call furry).
Oh Judy that would be a great selling point – showing how to cut them apart and then use separately or back together. I bet there would be some ooohs and ahhs as you cut through it. Maybe I could buy it ahead of when I had thought and you could keep yours intact and cut mine up? Or, do you have someone close by that you could take the scalpel to one set? I do know I want mine cut apart is why I suggested mine. Let me know.
I had to hold my breath a second when I read the title but I quickly went to the card and then smiled. Ah, surgery on the stamps! I had a little conversation with Brian King about this surgical procedure just the other day. He made a charming little squirrel card with the nut in it’s claw, paw, hand or whatever they have. He said there really is more room to cut them apart than it looks like in the photos. I love this card – just too cute and fun esp. the tilt factor. You could fussy cut them too and then prop up a leg or arm etc for a little action. Coloring, whether blended or not, will be fun with no streaking etc.
This weekend I had a great time at a cabin fever retreat. One of the demonstrations was the stamparatus. Now, Susan this card would be perfect for that since you also used your Stamp-a-ma-jig thing. She showed you can place the stamped image on a window sheet and using the one plate. Then, the other raccoon could and been stamped with the “thing” and masked putting the stamp on the top plate. Then, the third critter could be used on the 1st plate that you unhinge and move down whatever space you need. I know it sounds complicated but it was one of those WOW moments that you never knew could be done and so well. She was using the Pandas and some don’t stamp as well so she wanted to show you could restamp for complete tummy coverage. Then, since her stamps were on there she could make multiple cards if she wanted to. Of course, remember to keep your masking pieces and window sheet. This would be an amazing video if someone cared to make one. Any critters would look cute standing on top of each other like this.
Anyway, this is a very cute card and envelope. I agree those little hearts look great on lots of cards. I think that is a great set too.
Ah, if only I could purchase all these sets and have the time to use them! At least at the retreat I was able to use the lavender stamp set and Heartfelt blooms one so now I am not so afraid to use them. But, I also found out I loved using some other sets that I just have to move up to my “A” list. Who knew I could have so much fun with those little strawberries and the bird banter set.
My heart sank when I read your title! Phew!!! I think separating these guys is brilliant! You know, being in your house they probable learned some things and need to be separated! I am sure trouble was on the horizon! I agree, the Jig is a must have! And here’s to continuing education!
This card is “simply” adorable! I love the way you cut and stacked the critters. And I’m with you on the Stamp-a-ma-jig – I use it a lot – it’s a great tool. But I have a hard time convincing my friends!
I’m so glad the surgery was on a stamp and not you or your family. Cute card and I like the idea of cutting stamps apart. I have only done it once on some words because I couldn’t get them masked off well enough. Always like learning new techniques. Have a great day!
Great Idea…now I’ll buy that set! This card is so much fun…just like YOU!
Adorable card. I had seen the stamps cut apart and was telling my stamping friends about it last week. Makes me want this set. Love masking paper.
Too adorable! It is not always easy to see the full potential in a stamp. Have fun at the Copic class 🙂
Really Cute critter card, Susan! I would not have cut up the stamp though. I simply would have masked what I didn’t want ink on and then using my stampamajig, I would have stamped each one separately on top of one another. But this way worked for you, and if you are happy, then that’s all that matters in the end~
Wow….set the critters free! This card is adorable and I love your color choice. Your tips and tricks are always so helpful and spot on. Enjoy your Copic class and color away.
Ha Ha . . . having come from getting 4 stitches in my left third finger, I thought the emergency type of surgery. I was putting away my mandolin which was used yesterday and poof 4 stitches! LOVE this card. Makes me want to get this set more now too! Back to catching up on some SOTM kits and PP kits, as I really can’t do my transcription job for a few days at least.
🙂
This is too cute. I have cut a couple of my stamps apart. It was a solution that was easier than masking off. I have been masking a lot too though. I really like the effect of balloons behind a sentiment. It kind of makes a special effect. I agree with you that the “jig” is a great tool. Like any tool, it takes a little practice, but comes in handy for certain projects. Oh, and you do have a very generous rewards program. Thank you. I’m looking forward to my 2 new stamps 🙂
I would say surgery was a complete success! Thanks for sharing you idea! Your card turned out great!
This is the cutest card! Surgery success indeed!!