by Susan Itell | Jan 5, 2017 | Masculine, Sale-A-Bration, Uncategorized |

Hello and whew…..I am glad that we are on track and the excitement of the new catalog and the sweetest time of the year ~ Sale-a-Bration is here and in full swing! Thank you for your patience. As we all know technology is great but technology can be frustrating,
This new catalog is chocked full of goodies and remember, for every increment order of $50.00…you can pick a FREEBIE from the Sale-a-Bration Catalog. (Remember, you can always click on the hyperlinks but also find the catalogs on my header under Catalogs)
When you go to my online store, I love the way that Stampin’ Up! has the new goodies grouped together. I think that it makes it a bunch easier to navigate. I like to be able to see the bundles together, the stamps together etc….
Today’s featured stamp is available as a bundle and it is a beauty! The details are amazing and I invite you to think of all of the different sentiments that you could use to change it up from the already great sentiments that are in the stamp set.

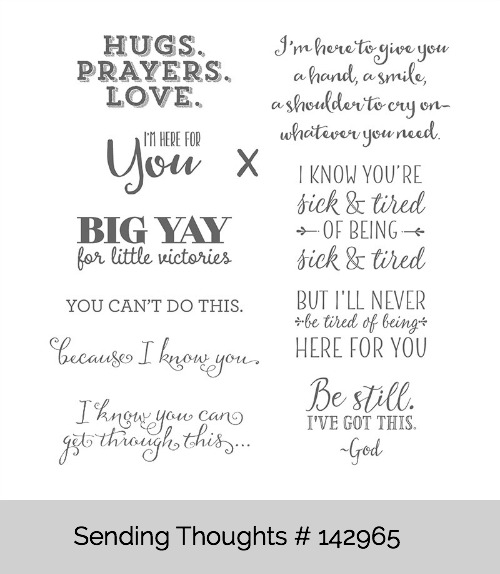
The fun sentiment is from the Sending Thoughts Stamp Set. WOOT-WOOT to Stampin’ Up! for making another super-de-duper sentiment stamp set. This one needs to be in all of our homes. It really fits the bill for many cards that we make and the fonts…super unique!

I will share with you the measurements of this super clean and classic card but before I do that I want to highlight how easy it is to adhere this balloon. You can make this balloon super intrigue or keep it ZOOM like I did (I like it that way, that TIME thing gets us) 🙂
My secret weapon was Stick It – remember I have blogged about this many times – If I did not have stick it I would take the green glue and dab it in as many spaces as you could, let it “set up” a bit and then adhere it down.
The beauty of the Stick It is that the adhesive is already on and it seals super tight, a great adhesive for diecuts like this! If I were you and in doing what we do, this product will be a lifesaver/timesaver for you and a little goes a long way as you cut it to the size that you need!

You could see how it peels right off to expose the adhesive and look how thin the release paper is – that is because the adhesive itself is super time – I just love it.
I adhered it to a piece of white (I know, kind of boring but heck, it works) and then simply took my paper snips and trimmed the excess off. The below picture will show you how I achieved the “lift” for my balloon.
I want to share why there are times that I like fun foam over stampin’ dimensionals. There are times that I feel a more “solid” 3-d coverage works better.(hopefully this makes sense) – Sometimes an object might “sag in areas” if we do not have enough dimensionals and this is why I like the ease and versatility of cutting up fun foam. (we all do not like sags…..do we? 😆 )


Wondering where the paper came from? EASY – it is a FREEBIE from the Sale-a-bration…..the colors are AMAZING and the patterns are so unique and fun! I sure did pick a boring one for today’s card, buy heck – I am trying to whip up a masculine card and this did the job!
Just think of how you could put many, many different sentiments on this card or heck, just leave it plain….thta beauty of the balloon speaks for itself!

Here are the measurement for this card. This is a layout that I adore to use when the lightbulb is not on in my creative head. I would jot this down as I know that you will use it often and trust me, no one will realize that you are using the same formula when you create with different papers/dies etc…..
- The Card Base is an A-2 in Basic Gray – 4 1/4″ X 5 1/2″ (I rarely use this color but WOW – I love the richness)
- The Night of Navy and the DSP are both 3 1/2″ X 4 3/4″ and then turned to an angle. (after I adhered them down, I took my old faithful white gel pen to add dots…darn, I love my dots!)
- The balloon was cut out with a scrap and using the Stick It product, layered over white and trimmed before lifting it up!
- The sentiment was simply stamped on a scrap and then trimmed to fit!

Easy…right? I hope that this posts inspires you to see that “easy is ok” and there is nothing wrong with it AT ALL. I actually had something different planned for today but you will see that later as I thought that this KEEPER bundle….was “fitting” for all of the hiccups of yesterday!
You can hover over the below picture and pin it to Pinterest so you can reference it for the future. This post is a great example of having 2 classic products, the bundle and the sentiment set….will produce many, many fun and unique card but the BEST THING? – You woul be able to earn a FREEBIE from Sale ~A~ Bration!

I also need to share that we had a winner for the Watercoloring Pencils…..Woot-Woot to Dominique as she was the 1st person to order and I know that she will LOVE them….they are a fantastic addition to our coloring line and I am proud of myself in trying to finally use the blender pens….(I know, I know~ many of you have said. “Susan…why don’t you use them” – well I am trying and so far I like them!!! 🙂
Make sure that you look under the header of Paw Print Rewards to not only see the generous Rewards Program that I offer but also the incentive for January….the BLENDER PENS!
Please feel free to email me if you have any questions about Sale–bration and also the ease of getting a 20% discount …all of the time. It really is a no-brainer and if you do not want to do one darn thing but stamp at home or perhaps with a friend, I say – THAT IS GREAT with me!
I signed up to be a hobbiest. With being able to pick ANY 2 stamp sets (from the annual or occasions) on top of the starter kit that you customize for your needs….it is a win-win. I would love to have you on my team.
p.s. – TOMORROW is the last day for you to take advantage of the 1st wave of the product share….I am sure that you would much rather get the new goodies next week as I will not offer it again until the end of the month – a GREAT way to get a taste without the calories!

by Susan Itell | Oct 16, 2016 | Birthday, Masculine, Step it up Sunday!, Uncategorized |

Happy…happy Sunday! Yesterday was GREAT and the BEST surprise was that Hannah drove home to surprise James. We had a family fun day and the highlight for the kids (22 and 26) were that we went to the Pumpkin Patch! I was internally saying (YES inside) as they still love the simple and traditional festivities that we did when they were grasshoppers.
We missed not having Will home but we all talked on the phone…..the weather was amazing and we sat outside on our patio….we we have a fire-pit…..John said, without skipping a beat – “Susan, you shoe is smoking” – I wish that you would have seen me JUMP UP!!!!! All is good and my shoe is fine, we all laughed! John was just so funny as he said it like it was no big deal….
Here you go…side by side – you decide!!!! I did a similar layout for a Monthly Card Kit and I will say that I think that it is a classic. I personally love the mixtures of different papers.

When I showed Hannah and said which one is which – she was perplexed (I think she thinks too hard) 😆 – But in my eyes, today’s is the stepped up one because of the piecing of the banner paper and then adding the Baker’s Twine. You might be saying ~ what about the numbers?????? Well, have no fear….I stamped them in the inside!


Another change that I did was to add the Dapper Denim instead of keeping just the black. To me, the little yet minimum pop of a color still lends itself to a great masculine card.
Today I did not use the banner framelits and I will share with you a tip. I said before that I used this layout before and I found if I cut the DSP paper (remember, this is a 6 x 6 stack) into 2″ widths, you can get (6) banners from a piece of paper. By adding the extra paper (in this case, the dots) you can stretch the paper! Using scissors is an easy way to make the banner if you do not have the banner framelits.

Here is your picture to pin….I know that you have a TON of DSP paper so I invite you to go to town and try this layout! Clean, classic yet fun is the name to this weekend post! I hope that I have inspired you this weekend and have also shown you different ways that you can do different methods of products that you have.
- Yesterday I used the number in the die cut way….today I stamped them on the inside
- Yesterday I used 1 DSP Print on the banner….today I kept the same print but jazzed it up with another paper.

We are having AMAZING Fall weather here in Maryland…just picture perfect and the leaves are starting to change. When Hannah came home she said, “Mom – your hair looks good” – I laughed and said – it’s the Fall weather……I am having a good hair day!
I hope that YOU have a wonderful day and make some memories. I am warning you…..giving you a total advanced warning – pop in tomorrow and you will be a happy stamper!
Thanks for sharing you time with me, I deeply appreciate it. I love what I do and I love the fact that my blog is also an expression of my life and love that I have from my family, friends and animals!
by Susan Itell | Oct 15, 2016 | Birthday, Masculine, Simple Saturday |
Good October 15th to all….this is a special day for ME (the Mom) because it is my MIDDLE PEEPS 26th Birthday (James) – as a Mom…I adore when it is one of the Peeps Birthday. I always knew that I wanted to be a Mom….and when I was blessed to me able to have my 3 peeps…I am a happy and blessed person!
Below you will see a super simple yet fun masculine card ~ you will have to pop back tomorrow to see the stepped up version and then you decide…not only which one “tickled your fancy” but also – which one did I give to James!?!?

Remember when we have chatted about the basic shapes? – A circle, square, rectangle etc…..worked again for this card! I let the BIG numbers a focal point to the card and you can see that they are POPPED UP?
I just love using “fun foam sheets” and these are a breeze to cut out just like you would do with Card Stock. To me, it adds that extra special POP!

Don’t be afraid to make a fun and bold statement using a mixture of patterns from a variety of papers! The stars are from the Warm & Cheer (Holiday Catalog) and the fun black crosshatch is from Playful Pallette DSP Stack!
This is a PRIME EXAMPLE of why I adore paper swatches when I do Product Shares….you can FLIP through paper offerings and let your mind go wandering to find the look you are going for!

Clean lines…yet still masculine and I love the sentiment from the Birthday Fiesta Stamp Set. This is another example as when you look at a stamp set…at 1st glance you might say….“This is to whimsical….or this is to detailed and specific”…but what I was looking for was a great Birthday Sentiment that would be great for a age for this age….BINGO!!!!
I only used the sentiment but below you will see that bundle that goes with this fun stamp set! This Lama is adorable but please do not overlook the fun and festive banners. These would work great with many different themed cards!

v
What do you think? A great and festive card (in my opinion) and I know that James will love it! Earlier this week I had a call from Hannah saying that she was having a hard time a perfect card….I said. “WHY” ~ I adored her answer…it will be a tough act to follow when I see the cards that you make (I melted – as she knows that I love what I do) 🙂

I am excited for today. James is home for the weekend and one thing that I have ALWAYS and it is STILL TRUE…
“If there were more James’ in the world, our world would be a happier place”
I deeply mean that. He is a wonderful young man and always has been a joy. He has the heart of gold and is so kind. His kindness and all around “happy nature” is always a breath of fresh air. He is our peep that has had some medical issues but I can say that I am in awe of his determination and commitment to learn how he can deal and take care of himself.
I am happy today….I am blessed to be a Mom and I look forward to having my peep home! He is the BIGGEST HELPER to me and John as he loves to be our “fixer” – we are doing fence posts….he is going to trim the upper branches of limbs that get in my way when I ride the horses….and just be here…home – it doesn’t get any better than that!
Have a GREAT day….and I hope to see you tomorrow for our SUNDAY FUN!!!!
by Susan Itell | Mar 2, 2016 | Masculine, Uncategorized |

Happy Hump Day! I know that you might be wondering….where in the heck did that super FUN gold FUN come from…..YEP ~ it is from February’s Paper Pumpkin Kit! I have shared with you before that it is so much fun to play with the products in the kit and think of it in another way….like I did today!
I knew that this would make a great masculine card and from the minute that I saw the FUN in the kit….YEP – I was going to use it in a different way! Today’s card is a 4 1/4″ Square Card (and that in itself is FUN) and then a 1/4″ smaller with the Rich Razzleberry and then the Botanical Gardens DSP (I love this print….very stately!)

The real FUN is the “cheers sentiment” that has been back~burner-ed for a bit….poor thinlit – it is all the way in the back of the catalog but it is a keeper and being paired up with the Vanilla Coaster Board….it is like PEANUT BUTTER AND JELLY!!!
This is a product that I think is very overlooked in our catalog and I highly suggest that you keep some handy as it really does come into handy and quite effective! I cut (2) of them out and then used “green glue” to adhere them together!


I have been having a bunch of fun with this stamp set, Greatest Greetings ~ the font is fabulous and the sentiments are fun and fresh. I simply used a piece of scraps to stamp the sentiment on and then banner cut them.

Here is a breakdown that will help you see the products that I used to make this fun card. For those of you that are subscribers to Paper Pumpkin…this refill is available and YEP…I have already purchased some! Please do not forget that a 3 Month Subscription is on sale for $55.00 which will let you earn a FREEBIE from the Sale-a-bration item!!!

Clean, classic and fun – I thing that this card is going to make my special friend smile! After all, that is what we want….to share a message, a feeling, a warmth of kindness and then comes the SMILE…..it does not get better than that!

Do you remember that I shared with you that I was going Pensacola on Monday? Well….Hannah and I did that and had a blast….it was wonderful to see my brother and see his new home….but during that visit…he encouraged us to go to New Orleans ~ and guess what – that is what we did…..Hannah was up super early yesterday…..rode 4 horses ~ came home and showered and off to New Orleans we went!
I was AMAZED that it is only an hour away ( SILLY SUSAN ), when we are at the show…we are in our little bubble but I must say…it has been FUN to make some day trips!!!! We had a BLAST…WOW ~ what a country bumpkin I felt…it was super easy to get to and it was super fun!
I thank you for popping in and also hanging in there with me while I am away,,,,it is a juggling act to fit a blog post in…..but that is what is wonderful about Stampin Up! We can make if work for out lifestyles….Until tomorrow!
by Susan Itell | Aug 14, 2015 | Masculine, Super Easy, Thank You |

Please do not click me off because this card is sooooooo boring…..
there is a story behind ii!
Last evening after James finished work, I needed to take him to pick up his car that was being worked on. When he hopped out of the car he said that he needed to stop at CVS to pick up a card for his intern that is having his last day today.
I looked at him and said…”James – what am I CHOPPED LIVER…..do you remember what your Mom does???” We both laughed and he said that he didn’t want anything fancy as it was for a young man around 21.
As I drove home I planned this simple card in my head and I knew exactly what to do ~ it was just killin’ me…no ribbon or twine…no punches…no dashes or dots….just a “Plain James” card.

Well…I must admit – it is really not that bad. I think that it is super hard to come up with clean and simple Masculine Cards and I will say that this paper is very fitting for a masculine card. The DSP is Typeset and it is just a very neutral collection.
The card is an good old A-2 size and then the “grid design” is just ¼” smaller = 5 ¼” X 4” . Here is a tip on how I decide what size of the vanilla paper I will need for the sentiment. Because I used the stamp-a-ma-jig, after I stamped it on the clear plastic piece I took my ruler and measured it roughly to determine the size I would need.

Now I know you are going to ask me what the size is…and I will add it to the post in the morning – I am sitting in bed with ice on my ankle and now my knee to as that is hurting from the “hobbling around” I then added ¼” to the size for the black piece.

Yesterday I had a comment on how do I do my envelopes with DSP. I am so glad that I was asked this. Sometimes I think that we take things for granted and heck….if you do not ever ask, you will never know so I am thrilled to do a quick run through.

It is so simple. If I am covering the back flap I cut a piece of DSP or cardstock to 2 ½’ wide by 6” long. The pictures below will help you and then I take the “green glue” and run a small bead of glue all the way around.


TIP ALERT: The best way not to get too much is to never “lift” the tip of the green glue up….just gently squeeze to get a thin bead of glue. IF you do get TOO MUCH – no worries, just set it aside and let it dry or set up a bit….it will just get a bit firmer and then when you put your DSP on it….it will not ooze out!
Simply rub a dub dub….and then flip it over and trim away the excess. ANOTHER TIP: – PLEASE DO NOT STRESS about getting a perfect cut. Trust me, just do the best job that you can and no one will ever know the difference. That is it my friends!

Now to the next funny thing….after James and I went through this whole thing about the card…I ended up making (6) of them for James to keep at work as he truly is wonderful in writing notes to people ~ John walked in the door and saw the cards on the Kitchen table and said…”Now I like these, can I take them to work!”
So the moral of the story is don’t underestimate keeping it simple. I know that it is not one of my usual cards but at the same time, it is true to my style!
This weekend I have a treat for you….when you see tomorrow’s card you are going to say – THAT IS NOT SIMPLE….but I will help you see that it really is simple.
It’s like looking at a recipe, many times if we see a recipe that lists a ton of ingredients we pass on it….and when you see the card tomorrow you will say, that looks hard…but I am here to help you!
Then….I already have the “stepped up version” ready for Sunday and I think that the little changes will make you smile! I was super pleased with it.
Thanks for being simply the best! Please remember that shopping away in your jammies is totally normal!!! (hint-hint) – as my Mom always said, referrals are the best form of advertisement so please share my blog and passion I have with my paper crafting fun!
Woot-Woot – the weekend is here…I hope that you will be able to pop in over the weekend and I hope that “MY GUYS” card today showed you that less is best and it works!
Until tomorrow!
by Susan Itell | Jun 18, 2015 | Masculine, PPA Challenges |

Happy Thursday! Today is the day of the week that we do our challenges and this week we are challenged with a sketch! Here it is…how about playing this week – it is a super straight forward sketch and I took it very literally this week! Kerry sure does know how to provide us with great sketches!

With Fathers Day being this weekend I thought that this would be a simple card for you to case away. This is the first that I have used the new Brick Wall Embossing Folder and let me tell you….IT IS WONDERFUL…WHY??? – It is a 6" x 6" folder which is a new size for us and the impression of the bricks is soooo deep which really brings it out.
This is sooo darn straight forward and the other NEW speed tool that I used is the Banner Triple Punch…this punches 3 sizes of banners BUT REALLY it punches so many more than just 3!

True it has 3 channels to punch in the widths of 1" 1 1/2" and 2" but if you basically place any odd size of paper and flip the punch over to where you can see the paper to make the banner part….POP – you can make your own size!
This is what I did today for two the them. The sizes are 1 3/4", 1" and 3/4". I also had some fun with the very vanilla ones by stamping on them.Being able to "see thru" the stamp made perfect placement a cinch!

This is probably the most simple punch Stampin’ Up! has made…I am sure that many of you thought….this is silly – we can easily make our own banners (I was one of the,…I 1st thought it was silly) but once you have it, you quickly discover how amazing and FAST it is to use.
The base is in Very Vanilla and then the “brick wall” is in Sahara Sand. Do you notice how nice and deep the impressions are of the folder, this really makes a dramatic effect.

The DSP banner is from the Go Wild Paper Stack and I took advantage of using the other banners to use some of the stamps from the Guy Greeting Stamp Set.
I know that many of you feel that we do not have a bunch of masculine stamp sets, but this one , Gut Greeting, is clearly a versatile one. Did you notice that Stampin’ Up! has made this set in all 3 mounts? I prefer the photopolymer for the ease of seeing through!

The envelope love came from some stamping on the front as well as I carried the brick wall in the Sahara Sand on the back flap…I love dressing up an envelope like this – you can do anything with "plain jane" paper!
I hope that you can find some time to play with this challenge. Hop over to the site to see what the beauties!
Remember that I am offering "Round 2" of my Product Share. I have all of my cutting and labels supplies all ready for me as I will be staying downstairs.This is the best way to get a taste of the new kids on the block!
Remember, shopping in your jammies is FUN…I’ll be in my jammies for the next couple of days. Enjoy the day…go do something fun and remember to make memories!
Until tomorrow!