by Susan Itell | Mar 10, 2018 | Thinking of you, Watercoloring |

Happy Weekend to you! Today I have for you a super sweet card that went through stages of OOPS while I was making it (and I will share with you the oops) but in the end turned out to be one sweet card!
When I am typing up my posts and if John is home….he often will ask to see the card that I made. When I showed him this card he smiled and said, “Your Mom would have loved this card” and YEP, he is right as it would have been right up her alley!
I haven’t watercolored lately so today I wanted to share some fun from the Friendships Sweetest Thoughts Stamp Set.When I saw this stamp set in the Occasions Catalog I knew this was coming to Randall Lane for 3 main reasons…

- I adore the way the artist sketched the stamp images, lines like this make it a cinch to color in all mediums….being watercoloring like I am doing today, using Alcohol Marker/Blends, Colored Pencils or even just our Stampin’ Write Markers….
- The price – $19.00 is a very good and fair price to invest in
- The Sentiments/font – I am strange….I like either super clean & simple fonts….or ones that “just catch my eye” and this one does that. You could easily use these sentiments with other floral stamps you have and also with a heart.
For the above reasons, this one was “coming home”! I encourage you to “think about” guidelines that are important to you before you just take a leap and buy. Let’s face it as we all do it – we buy things and simply do not use them.
Here is another little tip-bit for you to think about. Stampin’ Up! will be offering a new catalog in June. I know that seems like a way away…but reality is – it will be here before you know it! Actually in just 28 days (who’s counting…I am excited)
I will have the new catalog in my hands. With that said, this is the time of the year that I challenge myself to use up current DSP as we all know it – when new paper comes out….we will just “have to have it”….that’s why Product Shares are the best!
I chose my color palette today after I picked the DSP I was going to use. I know that it is hard to see but the Berry Burst color is actually a piece from the Naturally Eclectic DSP Pack and I covered the whole front panel of the White A-2 card. I like to do that when I am using watercolor paper as that paper is not as bright of a white.

The DSP paper is one of those that have a gradient look and feel to it and honestly – I have a hard time using them and I am a clean and crisp gal but this is a PERFECT way to use it as the subtleness of the coloring of the DSP lends a perfect backdrop to my focal image! This is the time of the year that I really try to use up current paper as when the new ones come out….they all get cut to 6″ X 6″ squares until I use them up!

When you watercolor make sure that you are using an ink that will not bleed when you color with the aqua painter. I used the Archival Black Ink to stamp the focal image! I was so excited to color (as it has been a while since I have used the aqua painter) that I did not stamp my sentiment…..that is where the BIG OOPS! happened!
I colored away and had fun and then when I stamped the sentiment…..YIKES – it did not stamp well and there was also a blob of black as I rocked the stamp! You see….It happens to me too! PLAN B – stamp the sentiment on a scrap of watercolor paper and then pop it up as I did!
Things like this used to get me super upset and frustrated but the reality of it is…IT IS JUST PAPER and I like to think that mistakes are a learning factor of life that happen to all of us to bring awareness. It was super easy to cover up my mistake and no one would ever know!

It is so easy to just pull your ink pads out, give them a good squeeze to get the ink on the lids and then go to town with the Aqua Painter. I always like to make sure that I have a folded up piece of a paper towel right by me as I work so I can quickly dab the excess off of the end of the Aqua Painter. Works like a charm every time!
You can see in my coloring that I just kept it super simple…that always seems to make me the happiest when I am creating but I do invite you to look at colors that you have…and sometimes layer them. WHAT DO I MEAN? Well..the area where the green is – I used Pear Pizazz and the Old Olive over top.
For the flowers – I first used Powder Pink and then added some Berry Burst to the inside of the flowers. For the “ground area” – I used Sahara Sand 1st…then went over it with some wisps of Crumb Cake and then the finale was to take my black pen and make some squiggles.
Always try to think of the simple little touches (like my trio of dots) to add your own special touch to your projects. Speaking of extra touches – can you see the centers of the flowers on both the card and the envelope? I add some white Nuvo Drops. I adore the wee little bit of the raised effect it gives.
You can see in that the Nuvo Drops come in a ca-zillion colors and there is no need to go crazy…I say that I use the clear, white and black the most but please make sure that you let them dry completely. I usually add them and then go back the next morning.

Envelope time….because the DSP that I used on the card was so “plain jane” I wanted to do something a bit different. A quick stamp 3 x’s did the trick but the accent of the White Nuvo Drops was the icing on the cake!
I think in the below picture you will see the height/dimension the drops give. Once they are dry (remember, super important) they will not flatten down or be sharp. I know that many of you are thinking if they will fall off in the mail….I have not had any to do that!
WHEW…there you go…..let’s move on!

On Thursday’s post….I threw out a fun puzzle/challenge for some Blog Candy as to how would I pick from the items that I had listed at the end of the blog post….that would end up at $124.50 for the Ultimate Bundle if I were picking for a starter kit.
Well….I am proud to say that dear Georgette won!!!!
There was one little hiccup in her math/choice…..as it is the Thick White Paper…not the Regular White. I think that she had meant to type the thick paper as the regular weight paper would have put her over the $125 target mark!
I had the AMAZING pleasure to meet Georgette last summer when she was in Maryland. She is from Ohio and reached out to me if we could meet. Let me tell you…..we never came up for air and we trurly had the time of our lives….and she is ONE TALENTED person!
WHY would I choose the Thick??? Easy, no-brainer….the thick creates a wonderful sturdy card…..(I actually sometimes think – how in the world did we use the regular weight before) Please do not get me wrong…the regular weight is a must have as well for the insides of cards and die-cutting & coloring…but if I had a choice of one…it would be the thick! Also – I would have picked the neutrals as one of my 4 cardstock packs and that would have had 2 sheets of the regular weight in it!
I know that this post is super long but quickly….I made my choices to get (4) packs of the potentially 5 options as with paper….you can ALWAYS have a great foundation. The other items….no brainer – the basics to card making!
The reason that I did not pick the stamp set is…..YOU CAN PICK 2 FREE ONES when you get the ultimate bundle! I had someone last night to be a smart and savvy stamper…..getting the ultimate bundle and I cannot wait to hear what (2) FREEBIE STAMPS she picked!
It really is that is…no strings attached….PERIOD….plus YOU will be able to see the new catalog when I do….in 28 days plus you can PRE-ORDER the new goodies from the new catalog starting in May…all at a 20% discount…..truly a win-win!
I will do another fun “Ultimate Bundle” game next week with more blog candy…it is super fun to think of the things we can throw in the to get to $125!
Enjoy the day….I hope that I inspired you to color and WOOT-WOOT to Georgette…..thanks for spending some time with me!

Like this:
Like Loading...
by Susan Itell | Aug 27, 2017 | Birthday, Watercoloring |

Good Sunday to you….I have what I think is a super special card for you and one that I do hope that you will not only CASE your little heart out but also think of me and my dear Aunt Jean when you use this stamp set! She is truly one in a million and a total inspiration to me.
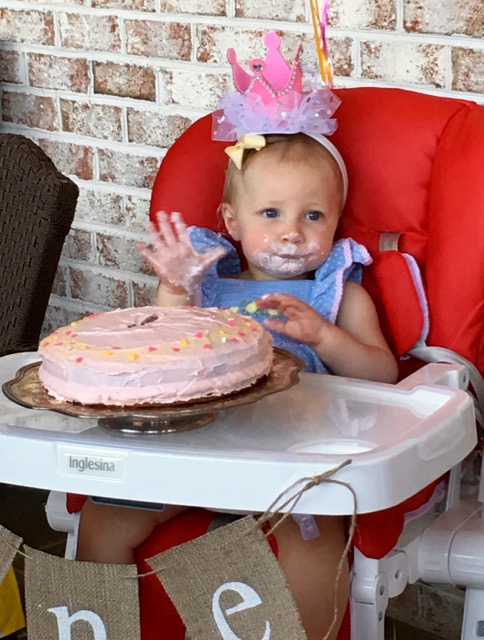
I have shared with you that she is turning 90 and yesterday we made the trek to her daughters home to celebrate her 90th and her great-grand daughters 1st Birthday! That in itself was oh so special as think….we have totally 2 different spectrums of “life” – both making you smile and both making you realize the sheer beauty that life brings to us!
I will share with you the card I made for Virginia’s Birthday next week and I think that you will beam as much with that one as I hope you are doing right now when you see this card.
I should have typed this up before I gave the card away but “life” was in the way so I am going from my head but I am thinking that perhaps I should do a video on it as it is super easy and fun. Just think of all of the endless possibilities we have with paper and colors of ink to re-create this over and over! you know what I call is…..“a keeper” The stamp set – Happiest of Days is the star of the show today.

The over all size of the card is a 4 1/4″ square (I adore this size) and today I did make a custom envelope with the envelope punch board but if you did not want to make your own envelope you could use on of our regular envelopes and it would be “just fine” and not require additional postage.
Here comes that “broken record” that I say over and over….but here you go AGAIN….
You just can’t go wrong with the basics
I invite you to LOOK at this card and see that there are minimal products used and the ket factor…basic shapes! I am tellin’ you – you just cannot go wrong! With the help of the trimmer, Mr. Big and framelits…a fun card is whipped together in no time!

Now let’s chat about the stamped image! This is what I like to do…stamp it on a piece of scrap Thick Whisper White and then cut it out using the framelit. I will say RIGHT OF THE BAT…I use my Stamp-a-ma-Jig for perfect placement when creating a card like this.
When you look at the stamp image in the set you can see that there are 3 gifts on that particular stamp…I actually used a small post it to eliminate that gift when I stamped but using the stamp-a-ma-jig made it super easy to see right where I wanted all of the placement of stamps.

You can see that the “cake” image appears to be behind the gifts…this was made by doing a fast mask of the polka dot gift I was able to put my mask down and then stamp the cake image! I simply stamped the cake on a small post it and fussy cut it out.
Using the Aqua Painter I did a quick wash of color to make the colors POP with the fun DSP that I used. The DSP Strip is just 1″ wide and isn’t it amazing that just this minimal piece of DSP sets the tone for the whole card!

Here is a picture for you to PIN and hopefully re-create! I just adore using layers of paper as layers of paper are a minimal expense with a maximum end result. I hope that this card has “brightened your day” and I would love to hear what you think of it!
I think that many of us are intimidated with the technique of masking and I even admit, I doubt myself as which one to mask but just remember, the image that you want to be in front is the one that you will make a mask of.
Here is a bit of advice, find some “me time” and take a stamp set and play…that IS the best way to learn and feel comfortable!

Here are some pictures from yesterday! I ask you….is she one beautiful person? Is was a joy to see her so happy having family from all over to be there together celebrating such a special milestone. My daughter Hannah is blest to live close to her and I am proud of Hannah for checking in and snagging a lunch or dinner with her.
Here is a funny…..about 2 months ago Hannah was going to Raleigh to see Aunt Jean for dinner and she said, “Hannah – how about if you just come to my house and then we will decide where to go”…well she did and that day the 2 of them sat around and she showed Hannah some of her old Text Books that she had while going to Chapel Hill years ago…and being the “science nerd” that Hannah is…she asked if she could borrow them.
After their “show and tell of the past” Aunt Jean said, let’s get an Uber and go downtown for dinner. Hannah looked at her with amazement and said ok – where are we going…Aunt Jean said, “I”ll call for one” and she picked up her I Phone and got an Uber herself…..I say = AMAZING!

Now go have a fantastic day and take a moment to smile when you think of someone that has inspired you in your life! We all have them…we just need to find the “me time” to sit and reflect….do it, you’ll be glad that you did. I can honestly say that 7 hours in the car for 3 hours of fun…..was well worth it and my “joy tank” is filled!
Like this:
Like Loading...
by Susan Itell | Aug 11, 2017 | Birthday, Watercoloring |

Hi there! I have a fun and fresh one for your Friday! (now say that 3 times super fast!!!!) I have been itchin’ to get this beauty inky….as I think we can all see that this is what I call, “a keeper” I ask you, how about these sweet images and the fun font!
The Happiest of Days Stamp Set is found on page 70 in the Annual Catalog and I hope that you did not breeze right past it! It is a super sweet and simple set but one that definitely can hold the test and mark of an amazing card!
You have heard me say this before, I adore stamp sets that have small images that are super simple. WHY? Simple just works!
This is a very straight forward card (except the fun fru-fru bow) and we will get to that in a bit. It is all about the basics with clean and crisp lines….works each and every time and will never, ever go out of style,
You know me by now, I just adore white. There is something just magical about a white card with a POP! This card really uses minimal products but still produces a big punch.

Since this is a new stamp for me, I conditioned it, stamped all of the images and put the image paper in my stamp set for future references and went to town. After I saw how incredibly simple these images are….I thought – all I need is a super quick swoosh-swoosh with the aqua painter and inks ….presto – DONE!
I really was not sure what I was going to do today….so I did use the Stamp-a-ma-jig on the stitched square….but then again, if I had a vision for this card – I could have skipped this step and simply did my stamping and then take the stamped scrap to the Big Shot and cut it out with the squarea! Silly Susan!!!

To help break up the white and add some interest and texture…out came the Sparkle Embossing Folder. I am starting to get a bit better in remembering to use them. They DO make a difference and they are so affordable. Don’t forget, I am giving the Layered Leaves Embossing Folder for all orders of $75.00 or more this month!
Embossing folder are fast and effective and there are many different techniques and different ways that you can use them. Simple me, I go for the tried and true old fashion way….just like I do with this card but you can isolate some areas that you want embossed….google for alternative embossing ideas and I am sure you will find some great ideas!

Time to chat about this fun fru-fru. First I want to say, it is not super bulky In the picture it appears that way but it is not. The reason why is that amazing Navy Crinkled Ribbon.I am just lovin’ this ribbon and I knew that I needed a bit of oomph to jazz up the card so I thought….play around!
Are you ready….cause this is super hard (ha-ha…it is sooooo easy) ….all I did was put down 3 short pieces of the navy ribbon and then took a piece of the Lemon Lime Twist Ribbon and cut it down to be a narrower width as it is a1/2″ ribbon and then tied it in a knot!
Next I took my scissors and cut into the edges of the navy ribbon to make them into random widths to add some poof! After I had them the way that I loked them…I took the Lemon Lime Twist Ribbon and make the next knot and simply trimmed the ends. Securing it into place was a cinch with a simple glue dot!
Now I ask you…how easy is that!?!? That Navy ribbon just has a natural POOF which is giving it the visual of it being bulky but it is “just perfect” for this card!

I just cold not stop with the envelope……I was having so much fun with this card – I just could not stop! To help pull the whole thing together, I just took the coordinating card-stocks and cut them into random widths and jazzed up the envelope before also adding a small piece of the embossing paper as well.
Call me crazy for always making my envelopes fun but that is just me, that is hope I roll and it is just a habit of mine. I can honestly say that whenever I create a card, you can bet that there is an envelope that is also fun! I feel….it “sets the stage” for when someone gets Happy Mail!

Have a great day and I hope that it is an “oh, happy day” as each and everyday is a great one!! I hope to see you tomorrow…there’s a baby to celebrate….in a Simple Saturday kinda way!
Don’t forget…jammie shopping is sooooo on trend (just sayin’!) I know that the new catalog is right around the corner and that is SUPER exciting but one thing I will suggest….is to get a piece of paper out and be realistic as what you want to accomplish over the next couple of months!
What am I talking about??? Well let me share!
I am sure that you are like me…that you like to make gifts with your hands – that is GREAT and you know that I am all about that but make a list of all of the things and people that you want to make things for….you will be soooooo happy that you did as it is a HUGE help to visualize that..,and then put a plan into action. I know that IF I can see it and IF it is written down that I have a better chance on breaking it into action steps!
Now go grab this Friday and make your mark it!
Like this:
Like Loading...
by Susan Itell | Jul 21, 2017 | Watercoloring |

Here is another super FUN stamp that is in the new catalog that I bet many of you have flipped right past! Quirky Critters is a super sweet set that has not only fun images..but the “quirk” in the sentiments is fabulous & fun!
To me…this stamp set is very similar to the stamp that I posted about on Wednesday (click here to see it) in the “whys” that I have in purchasing it….
- It is an affordable stamp ($17.00)
- It has large images that make a quick clean and simple card
- The sentiments are super
- You can do a quick watercolor and DONE! (works for me!)

When you go back to Wednesdays post you will see that the layout is very similar – you know what I say about that…..yep – WOOT-WOOT as really “who cares” – it is one of those “formulas” that I talk about often and I feel…there is NOTHING WRONG at all for having some great foundations to work from when you make cards!
Layers…shapes…straight lines….a bit of bling (ribbon) – what more could a card maker ask for? I chose to use the Aqua Painters to do a quick “makeup application” but I promise to try to break loose and use the colored pencils and blender pens more….I am a “quirky critter” myself – I like what I do over and over!!! (that comfort zone gets the best of us)

The strip of DSP adds that focal interest to the overall body of the card but it really is the layers and the simple lines that make the card “easy on the eye” This is something to think about as if something is too busy, your eye does not know where to focus!
How about that ribbon? How simple of a touch is that! Here is a tip…..I like to use glue dots to anchor ribbon like this down…..it doesn’t seem to “twist” as it might if you used fast fuse or snail. Those little dots sure do come in handy!

I think that this “coffee fun” that is in the new catalog has been a blue ribbon winner all around! Not only is the bundle stellar…..but the DSP is also over the top and you can see that this card has NOTHING to do with coffee!
This is a great example of why getting the “swatch books” when I do a Product Share are a huge helper. When you go to create, you have all of the samples at your finger tips to “flip through” and actually put it next to your project!

I totally forgot to list this Embossing folder in the below lineup….it is Polka Dot Basics – and it is a classic that goes the extra mile….each and every card! You all know I adore Polka Dots….they make me happy!

Hopefully we are back to our little piece of heaven, our home. It will be great to sleep in our own bed….it will be great to have my “critters” around me and it will be great to get back in the swing of things!
Now so fast…..this weekend I have another batch of “team posts” for you…..I do hope that you will pop back over the weekend for a sweet 2 day posts that will make many of you go grabbing for that sweet stamp set, Cool Treats!
Next week we are going to have some good old fashion Simple Stampin’ fun as I am going to share with you my adventures…..have a week long post of blog candy as you all are the sweetest in the world….for popping on and supporting my little Stampin’ fun….this trip would not have been possible without you!
Like this:
Like Loading...
by Susan Itell | Jun 22, 2017 | Watercoloring |

Good Morning and it is time to play Tic-Tac-Toe! Last weeks challenge was so much fun and we are back for another one! The team that I am on is “off” this week but please make sure that you pop over to the Tic-Tac-Toe Challenge to see what Team X is up to.
I am just lovin’ playing this as it is super fun to look at the board and them have fun! I hope that you will join us and just a “heads up” – the challenge goes to noon on Tuesdays…click here to see the rules!
Today I was able to play (2) ways! 😀
- Diagonally – Yellow, Twine and Bow
- Across the bottom – Yellow, Stitching and Rectangle


Today I have a super sweet card for you that is one that could easily be made in the masses. The star of the show is the Pretty Kitty Stamp and this is a sweetie… If you follow my blog (and I hope you do)….you know that I am a dog/horse/pig kinda gal! I admit….even though we live on a farm we have never had cats….but I have lots of friends and also a peep that has a kitty!
I caved in and purchased this set and I am glad that I did. Do you remember that in previous posts I commented about looking at stamps and weighing all of the options before you hit that button….well for this one here are my thoughts!
I encourage you to do this when you are weighing options….trust me – there are certain stamps that you know right off the bat (like the Piggy and Craft one) 🙂 but these were the answers for me about the Pretty Kitty Stamp.
- The images are adorable
- The sentiments are fun yet classic
- The font is super simple….just like me!
- The images would be easy and fun to mask
- I get to watercolor or use markers & watercolor pencils
- The stamp set lends itself to clean and simple cards…again, just like I enjoy making.

After stamping the image with our Archival Black Ink…all I did was pull out the Aqua Painter and some ink pads, gave them a squeeze and went to town….the coloring literally took me less than 2 minutes! You can see the colors that I used in the line up at the end of the post.

Trying to follow the game. I knew that I was going to a rectangle….that was easy enough – pull out the best trimmer in the world and cut. The yellow mat was cut a wee bit larger so I could take my white pen and “stitch away” ….and we all know that I adore my dashes and dots!
Envelope love….my swatch books to the rescue so I can see and feel the paper that I want to use to accent my project and POOF – a great print in the Birthday Memories DSP collection!

Remember, tomorrow is the LAST DAY for you to take advantage of my Product Share and when I talk about the swatch books…..that is Share #1 – I get it…I get it – that they are pricey but please trust me on this one – they are very labor intense to make but they are something that you will use over and over. As the saying goes…you pay for what you get and these tools are daily life savers for me!


There you go and I ask you….how are YOU going to play this week? I do hope that you will take this board and have some “me time” and go for it. There are so many fun ways to work the board and I know that each and everyone of us have the supplies….how about challenging yourself to play!
I hope to see your name and masterpiece in the gallery – challenges are FUN…..challenges are a great way to find that inner mojo that we all have!
Enjoy the day and I am glad that you “peeked in” today to see what I am up to! Today is the day that Mr. Perfect (aka Milo the super dog) goes to see Dr. Hurry for his leg….he might just have 3 legs that work great but that never stops him from being the happy boy he is!
Hmmmmm….maybe that is a life lesson for all of us – things might not be the way we wished them to be….let’s try to make the most with what we have! Now go grab this day and make someone smile!
Like this:
Like Loading...
by Susan Itell | Nov 28, 2016 | Christmas, Watercoloring |

Hello all! I am super excited to share with you the next card using the Merry Mice Stamp Set! This ADORABLE stamp set in a part of the STITCHED FROM THE HEART Sale...and I ask you, how can you NOT let these adorable mice come to your home! Trust me, when I see a REAL mouse at the barn – THEY MAKE ME JUMP….but these little guys…will always have a home on Randall Lane!
How can you not say YES to these guys…..for just $12.75 how can you go wrong! You can click here and here to see other posts that I have done with these super fun mice! Below I share with you all of the dimensions of this card…..CASE AWAY!
Hannah and I named them….these guys are ~ Merlin, Molly & Mikey! I just think that they are soooooo adorable and water-coloring with the aqua painter is just the best! Please know that there is no need to worry about this simple tool, it is soooooo easy, just add water….add some ink and you are good to go! I squeeze the ink pad and paint from the top lid.
This is how I started out with making this card. I always stamp extras not only for more cards but “just in case I make a mistake” but then I thought, SILLY SUSAN (again) I needed to make the card stock longer to have a sentiment!
As I have blogged before, I like to use a cutting board (just go to Bed Bath & Beyond and use a 20% coupon) and use Micropore Tape to hold down my work! I actually did this yesterday while watching football and doing laundry! Fun….RIGHT?!?!?! I know that the link for the tape has MANY rolls but share it with some friends!

The card is an A-2 Card and then I used the FUN plaid from the Warmth and Cheer DSP Stack to cover the entire front ( 5 1/2″ X 4 1 1/4″) and then the Whisper White that I stamped is 4″ X 2 3/4″.

I often am asked this question…What Ink do you use. I use the Basic Black Archival Stampin’ Pad. Actually this is the only Black Ink that I use. I still have other Blacks on my shelf but honestly, I have not touched them at all even since this came out. I highly recommend this ink as it is a permanent ink and it dries super fast. I will give you a heads up – purchase a refill. Maybe it is me but I find that I need to re-ink this often (heck – it is probably because I use it all of the time) 🙂

The colors that I used to do the water-coloring were: Sahara Sand, Garden Green, Real Red, Delightful Dijon and a wee bit of Blushing Bride for the inside of the ears and cheeks. I love water-coloring on the thick Whisper White. It works perfectly and it also does not curl!
I matted the colored image to a piece of Sahara Sand that is a wee bit larger, 4 1/8″ X 2 7/8″ and then the Real Red piece is 4 1/2″ X 3″ and I did run this through the BIG SHOT with the Large Polka Dot Embossing Folder (you could easily skip this but I think it makes it super fun)

I adhered the layers together with Fast Fuse and then I popped up the entire image using fun foam but you can easily use Stampin’ Dimensionals. I personally like the “feel” of the fun foam when you have a larger piece that you are popping up…
Because I had this odd piece left over from cutting the plaid, I used it to my advantage to make my envelope SMILE! I had to use a bit wider accent piece, it is 1/2″ wide


There you go but we have some SERIOUS SHOPPING BUSINESS to talk about as today is a ONE DAY FLASH SALE. We are still full steam ahead with the Stitched From the Heart and the Online Extravaganza (click on the images and it will take you right to the SHOPPING FUN)
Have a GREAT day….my house seems as quiet as a Church Mouse and the PEEPS are all gone….long trips but they all made it safe and sound….that silly Hannah – after driving for 7 hours….she went right to the barn to see Stanley!
It is CYBER MONDAY…..make sure that your computer is charged up and ready to go…have fun – I just love clicking and then seeing the Brown Truck roll done the lane!


Remember….TODAY ONLY is the FLASH SALE and I am sure there will be LOTS OF BELLS RINGING as yep, the Bell Punch is on sale…a classic…actually all of the goodies today are classic! (again, you can click the image)

Here is that PAW PRINT…..give it a HIGH FIVE and it will take you right to my online store…jammie shopping is in style! 🙂
Like this:
Like Loading...


