by Susan Itell | Dec 12, 2018 | Christmas, PALS Blog Hops, Uncategorized |

Welcome to the Pals monthly blog hop. We’re so glad you’re here! December is time for glitz and bling with “All that Sparkles & Shines”. Today we feature projects that sparkle or shine. Maybe even a little of both.
You may be starting the hop here or coming from a previous Pal’s blog. Either way, you’ve come to the right place. You’ll find the the full line-up below to help you move, or “hop” along from Pal to Pal.

I have a fun, clean and special card for you today! If you are new to my Blog….WELCOME but for those good old faithfuls….I have a double whammy for you today!
A “keeper” and a “formula”…
For you newbies….you might be sayin’ what the heck is she talking about? Well a “keeper” to me is something that is timeless, a true blue classic and a “formula”….well that is, a layout that you can use OVER and OVER with many stamps and papers you already have…for countless card themes….one for you to jot down the measurements and file for the future!
Let’s get going! This card is showcased with the stunning Dashing Deer Bundle and YES….it is being carried over so pull out your chair and do a little dance as this is one versatile and classic offering!
Remember, you will ONLY GET THE 10% DISCOUNT NOW as after this catalog it will not be a bundled price and heck, that is $5.00 so why not – helps towards shipping!

I hope that you can see the detail of the stamp. I was just THRILLED with how this stamped and I love the fine details that the framelits give! It is details like this that you say to yourself after you run it through the Big Shot…WOW – I did that…..and it was so easy yet so WOW!
I was not happy with the way my photos turned out as it is so hard to capture the sheer elegance of the gold foil paper so you are going to have to trust me…it is one classic that I would be SUPER proud to send!

I just adore using lots of paper with layers. It is a simple but always effective way to showcase a clean and simple card…my favorite type of card to make! I have several “close-up” shots for you so I hope that you find them helpful in getting the feel of the card.
Another thing that I adore to do is score! I always use the Simply Scored when doing so as I feel it gives you a much deeper score line …look below at the way the gold foil paper was scored….I think it is STUNNING and just the right amount of bling to make the card have that WOW feel!

I am not a card maker that uses a bunch of sparkle and shine to my cards but I will say, the holidays are a time that I do enjoy using it and the overall effect that it brings is just the “right touch” With that said….here is a GREAT TIP for you….
I would make sure that you have the Foil Sheets in your stash as there is nothing worse than working on a project and saying….now a bit gold or silver would do the trick and then for you to find out….you are out!
I have listed at the end of the post the (4) different offerings that Stampin’ Up! offers in the Foil Papers…they are a great price point and you only get 2 sheets so it is not like you have a big worry of storage of MORE PAPER…trust me on this one,,,you will be happy that you have them for when you need that extra special touch!

Now for what I know you all want…..THE FORMULA! Well…here you go and I do hope that you will copy this down and then make one! When I blog about “formula cards” I always encourage my blog readers to go NOW to their craft area and make one up….even if you do not have these exact products….
This way you will be able to reference right back to the pictures. This formula is a great way to use up paper and also a way to minimize the amount of DSP that you use.

- Card Base – a regular A-2 Card….4 1/4″ X 5 1/2″
- The Gold Foil Piece is 2 3/4″ X 5 1/2″ and then scored at 1/4″ and 1/2″ on each sides….(long side) and then on the (short sides), score at 3/8″ and 1/2″ on both ends. Adhere to base of card. (If you have the little markers for the Simply Scored…just put them on the Simply Scored as it makes it super fast and easy to remember where to score)
- The solid piece of cardstock is 2 1/2″ X 4″ and then the DSP is the same. Adhere over the gold with tilting the Solid rectangle as shown.
- Add the focal element to the card…for today, I used the deer and then popped it up with some slivers of dimensionals to give it a lift! A wee gold bow adhered with a simple glue dot was the perfect bling for this classic Holiday card!
- Add a sentiment across the middle on a strip of paper. I think an element like this is the icing on the card as it creates an interest to the eye without being super distracted! I also like to only cut one end of the sentiment strip and also extend it over the rectangles…
There you GO!!!! I hope that these directions are a great help to you and I also hope that you will make this layout up! I am all about making multiple cards up and with the Stamparaus….it is a breeze to do so! I hope that card touched your heart and has inspired you to get inky today!
More inspiration awaits! Use the Blog Hop Line-up below to visit the rest of this month’s hoppers. My fellow Pals are excited to show you what they’ve created. Don’t forget to show us some love by commenting on our creations.
Mark your calendars for Wednesday, January 9, 2019 when our Hoppin’ Pals share projects “From the Heart”. Don’t miss the fun.
- Mary Fish at Stampin’ Pretty
- Wendy Klein at Doggone Delightful Stampin’
- Peggy Noe at Pretty Paper Cards
- Rae Harper-Burnet at Wild West Paper Arts
- Jeanie Stark at Just Stampin’
- Jackie Beers at Blue Line Stamping
- Denise Hoepfner at The Mountain Magpie
- Jennifer Michalski at Stamping Serenity
- Stesha Bloodhart at Stampin’ Hoot!
- Linda Suarez at All Night Stamping
- Lisa Ann Bernard at Queen B Creations
- Leah O’Brien at Stamping By The Bay
- Lori Pinto at LollyPop Paper and Ink
- Katy McGloin at Just Fun Stamping
- Su Mohr at Aromas And Art
- Pamela Sadler at Stampin Pink Rose
- Susan Itell at Simple Stampin’
- Sandra Conner at Pretty Provisions
- Beth McCullough at Stamping Mom
You have a bunch of hopping to do so you better HOP AWAY! I thank you for hopping in today – it feesl great to be back hopping with the PALS! Be a sponge and soak up all of the inspiration that you will find with this hop…
‘Tis the season for all of us to sparkle and shine and with that said….enjoy this wonderful and oh so special Holiday Season that is quickly coming upon us!

by Susan Itell | Nov 29, 2018 | 3-D Projects, Christmas |

Good Morning and welcome to my first post with the 3 of the OH SO TALENTED ladies that are a part of the 3-D Thursday Post..Twila Davis, Debbie Henderson and Sarah Wills. I have a funny for you before we get into this post…you know me, I love to share stories with you!
If you are new to my blog….WELCOME and you will quickly learn that I love to craft (duh!!!), I love my peeps (they have all flown the nest), I love my animals (dogs, horses, a beautiful piggy, and a dumb donkey).…I have the sweetest husband in the world (John) and the thing that I like most of all about my blog is that I love to share my love of crafting and life with YOU and it is my goal to make sure that you understand every step and what makes me roll! OK….moving on!
Back in October I received an email from Sarah Wills and honestly I thought it was spam/junk mail…basically a huge joke. I did open it and she was asking me if I wanted to join these ladies with this Thursday FUN that they so graciously do each and every week! I immediately thought….this is a JOKE….me???? Simple me that loves 3-D’s but mine are about the most basic things that come down the pike!?!?
I admit, I did chuckle and when I responded I said….are you sure??? I know that we are all perhaps in the same boat of following other blogs…..and YEP – this Thursday 3-D group of talented gals I have followed and I have also made and shared with YOU some of their ideas!
Well….here you GO! I make these each year and each year I am always beings asked…..can you send me the dimensions of how to make a decorative check holder! Well…here you go! The most important thing to remember is…..there are NO RULES in how or what to use to decorate them however I think that these Snow Flakes are just stunning!

My main objective to decorating them for you this year was to show you how you could easily do a Masculine Twist to it buy having a “Search and Rescue” session with your DSP that you have hoarded away…..(I know that YOU ARE OUT THERE)….Well let me ease your pain in trying to think out of the box!
There are GREAT option with the Twinkle Twinkle DSP and also the Best Route DSP (this is really one of my favorites and I believe that it is (sooooooo overlooked). We all know that there are some handsome plaids in the Holiday offerings but for today I wanted to share with you how you probably already have something that will work!
The next thing that I wanted to showcase was this AMAZING and classic Snowflake from the Limited Edition Snowfall Thinlits – and TOMORROW IS YOUR LAST DAY to grab them as they will be retired. Click here to see a post that I did yesterday using them, There is just something so special about a snowflake!

Have fun scrolling through the pictures and at the end of the post you will see that there is a PDF for you to use for a reference. One thing I always share with you all is..when you see a project that interests you….I would STOP and make the time to make one up – that way you will get the feel of what you are reading and seeing with the pictures. You do not have to go through all of the fru-fru details of embellishing it…it is just to get a good and solid feel!
Here are a list of bullet points that I feel strongly about in having success with this project… (I know that you all probably already know all of this….but just in case)
- Use the Simply Scored Tool – I know that our trimmer has a scoring part to it but honestly you will see a deeper and cleaner score line with this tool. This goes in my “MUST HAVE BASIC TOOLS” for a card maker!
- Use a Bone Folder – Again, having the right tools makes all of the difference in the world. Using a bone folder will ensure a clean and crisp image.
- Use a super strong adhesive – In my opinion, I love the tear n tape for most 3 -D projects. I just think that it allows for a super strong hold!
- For adhering paper and embellishments….I still have a bunch of Fast Fuse and I do LOVE IT but I also highly recommend the mono glue (aka green glue). I am personally not a fan of our snail adhesive but I realize that many adore it….
- Do not make your “belly band” too tight…this is something that always seems to happen when you make your 1st one. I simply fold one side over and then repeat for a loose crease and then I remove it and give it a great score with the bone folder!

Any small punch will work, I just used the 1″ one!

You can see that you use a minimal amount of DSP….just try to be clean and tidy with lining up the pieces! Take the extra time to line things up is a great habit to get into for always walking away with a professional and classic look!

Here is the star of the show and it is SOOO darn tootin easy to make and it has a huge WOW factor! I wish that you could see it in person as it is quite a beauty!
I was tickled with the look of coloring in 2nd image (I cut it out of vellum) with the Stampin’ Blends! Naturally this is optional but it does make the layering interesting. I did use the Blend on the pearl as well!
As for adhering them….because I used some of the Sparkle Glimmer Paper….I did use several glu dots to hold them in place but have fun with dimensionals etc….remember, no rules…just use up what you have!

You can see on the one to the left I did heat emboss a sentiment from the Beautiful Blizzard Stamp Set. I know we all have many options that we could use but honestly most if the time I let the “fru-fru” from the front be the only adornment!
Here is a GREAT IDEA – if you have someone that love to travel…and/or if you are giving them a trip….WHAT FUN this paper is! I was super excited and also the bicycle print that is also in the Best Route DSP….that is another keeper to make for a project like this!

Remember…the sky is the limit with how you can have fun with these! This has been such a fun paper. A quick fussy cut of Santa did the tick! We all have a smile on our face when we see this sweet paper.


Well…there you go my friends! If you wish to subscribe to my blog…just put your email in the box! It is under my picture on the upper right hand side of my blog! Below you will see the PDF for you to print off if you wish.
Please do not hesitate to send me an email of you have any questions about the project! I would also love if you leave a comment and let me know how you like this project. I feel super blessed with a great group of “blog groupies” and we sure do love to yack back and forth!
Pop back tomorrow as I will have a great smile maker for you that is not only super easy….it is a project that you could whip up in no time and you will have a bunch of “new best friends” as they will LOVE IT!
Here are the the 3 talented ladies that graciously invited me to join this Thursday fun….please grab a cup of coffee and enjoy seeing their talent…I know your jaw will be dropping! It is just a blessing that this thing that we love to do with our hands…can take us all over our great country and develop friendships!
Twila Davis – Stamp A Little Longer
Debbie Henderson – Debbie’s Designs
Sarah Wills – Sarah’s Ink Spot
Click below for the printable PDF for you!
3-D Thursday Check Holder
by Susan Itell | Oct 21, 2018 | Christmas, Uncategorized |

Hello to all and do I have a FUN post for you today! I know that it has been ages since I have blogged and I have missed you guys…I had shared with you all that this Fall was going to be a super busy time for me with traveling and I have learned one thing…HATS OFF TO THOSE that can travel all of the time and be balanced with daily life!
Don’t get me wrong….it has all been SUPER FUN but I am a pooped stamper and my poor suitcase never gets to make it back to the basement…John and I leave on Wednesday to make a trek to the great state of Texas….to see some very special people….and I do hope to blog about it as I know it will make you smile from ear to ear!
I have not been short of ideas for you and for my blog….it is that darn TIME THING that has stopped me from blogging…..the creating part is the super FUN PART…..it is the taking photos, editing them, typing up the post, linking the products….all of those that are the true timer bandits!
Enough….let’s get to it as I have a C&CKC for you today……yep, that is my new little tag smile maker for you…
Clean & Classic Keeper Card (say that 5 times!)
Holidays always seem to bring out the best of us when we sit to create our cards for our family and friends. Using vellum is always a classic and it instantly will step up the game for you but the one thing that we all seem to have to deal with is…..
How in the heck can we hide the adhesive on the vellum?
Trust me, I GET IT as you know I like to always have a well constructed card with clean workmanship and we all know working with vellum is one of those “special touches” that is fun to implement into our cards but that DARN HIDING THE ADHESIVE GAME can be a challenge!
I do hope that you stay with the length of this post and also the amount of pictures that I have for you today but again, you know me…..I like to make sure that you “get it”
I will be sharing with you tips that YOU DO NOT WANT TO DO…..as well as the TIPS THAT WILL MAKE YOU SMILE! The way that I look at it is….learning from mistakes that I made will save you time in the long run!
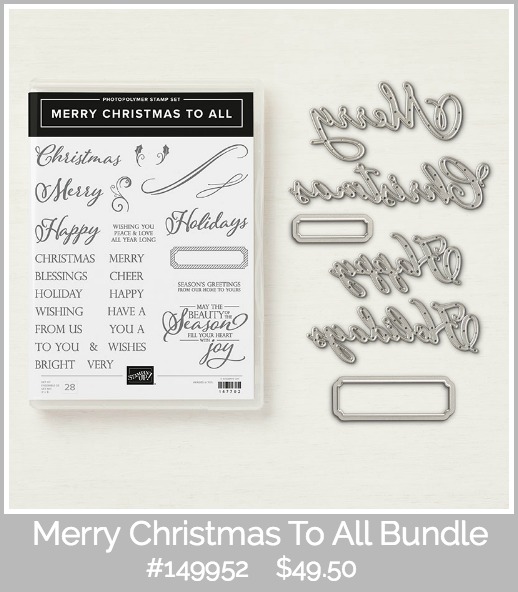
I am mainly working with the SUPERSTAR bundle from the Holiday Catalog….the Merry Christmas to All Bundle. It is chocked full of fabulous sentiments to create a classic card but the framelits….yep, to me – they are the show stopper as I am a HUGE FAN of sentiment words. This IS one that will be a yearly staple for you….
Below you will see another keeper, the Swirls & Curls Embossing Folder! This is another dynamic folder that leaves that super deep impression that will bring an instant smile to your face. I used this on all cards today and you will see the classic look it gives and the best thing – you can use this all year long as it is not just limited to the Holidays!
This will be your FREE with a $75+ or more with me this month…if you already have this, no worries….I will glad to substitute with another embossing folder….I just want you to be a happy stamper that STAMPS!!!
I know that you will “get this” and chuckle….we are all pretty good…actually GREAT at collecting things/products……but we need to USE THEM! I will say….I have been a stampin’ machine lately and it has felt great to create and send mail…..that is why I started with SU and I will say, going back to the roots of doing what I love is making me smile!

There is really nothing hard about this layout as it is what I love and do best…keeping it simple! Simple Layers of paper and embossing and then using the circle framelits to create an ornament….PRESTO – DONE…..but here are the DO NOT DO’S as well as the TO DO’S
It is all about using the basics….

The KEY to making this work is to use the Multipurpose Adhesive Sheets and to use MULTIPLE LAYERS OF THE VELLUM CIRCLES before you add the Ornament to the Embossed piece or cardstock!
Keep reading as my photos will be helpful! I heat embossed on the vellum and in the sample below you will see that I used 4 different embossing powders….heck, it’s the holidays and there is nothing like heat embossing and seeing that luscious and rich powder melt to smoothness!
When you heat emboss…..ALWAYS USE the Embossing Buddy….it is the best way to ensure that your end result will be a beauty! Heat Embossing is probably still the biggest WOW that we love to see and do!
Remember when I said that you will need to use MULTIPLE LAYERS OF VELUM CIRCLES WITH THE MULTIPURPOSE ADHESIVE ON THE BACK?…..well….yep – follow that tip but do NOT heat emboss the sentiment with the adhesive on the back…..
Look below…you can see that the result is terrible – the adhesive melted underneath and created bubble……

Now look at this one below……a BEAUTIFUL MELT!!!! After you heat set the sentiment….THEN PUT THE ADHESIVE ON THE BACK and then you can go ahead and add more circles of vellum.
I like to use 3 layers of vellum…..I am being totally honest with you as I think that the 3 layers give you the best end result! In this one below……I did use a white circle under the last layer but I think you get the idea of where I am coming from!

Hopefully you will see the adhesive on the back of this below….I am a HUGE believer of making sure that you have the right products at your fingertips so when you take the time to create….you have everything you need at a reach. Having the Multipurpose Adhesive Sheets IS a must have…..(actually I have MANY) as I would never want to be without!


Below you will see another example of what not to do……I ADORE this layout and colors/punch that I used…..but I only had 1 piece of vellum and you can see how the embossing folder shadows peek through.
This would have been TOTALLY AVOIDED if I would have added 2 more adhesive vellum circles underneath the stamped one! I know that O am being super picky….but I am trying to be true! I also loved what I did with the envelope! I really just wanted 2 rows of trees….so adding the 1/4″ strip on the top and on the bottom was a winner!

Look at this beauty…..I love this combo! The copper is just stunning. This would have been PERFECT if I would have added the 2 circles underneath……here is another tip that I always do…I add a bow with a glue dot and then just adhere the anchor to the back of the embossed piece with an adhesive.
I know that some of you might be thinking I am being to type A….but heck – what is it to just add 2 more circles…..
I just love a clean card that the mechanics of it are completely hidden. I know that time is a factor for some of these tips….but trust me, the time you spend to the details is so with it and your style becomes more reflective of workmanship the more you do it.


You know that I adore plaids….and this one I added more of a DSP to the focal of the card but you can still see the classic ornament! To me, this is a great card – I love the colors, I love the style and YEP, there are 3 layers of vellum and then a white circle…..creating a beauty!


I love dimension….and trust me, I have a CA-ZILLION Stampin’ Dimensionals but I also love to use fun foam! It cuts perfectly with the framelits and below you can see that I just used a smaller circle and adhered it!
Why do I like fun foam so much? I love the solid feel it gives to a larger element….if this was smaller, I would have used a dimensional!

Below you will see how I used these products…..all BASICS that created a fun and oh so beautiful of a Holiday Card! This would be a card that would be super easy to MASS PRODUCE and also a great card to use up your DSP…..you could easily use the layout and then just choose the color scheme to what you have on hand!

Well…there you go! I DID IT…I POSTED and I hope that you found this helpful! I know that my posts are so long…but that is the way I roll. It is my goal to make sure that you completely understand how YOU can make this card!
Please feel free to leave a comment and a HUGE CYBER HUG to each and everyone of YOU!!!! Please make sure that you use the HOST code of 76FGF2W6 to get the Embossing Folder with a purchase from me this month!
For those of you that have already purchased from me this month, I will reach out to you as I never changed the offering for this month! You will always find the current host code on the right side bar of my blog!
Go and have a great evening and I hope to be in you “in box” soon……

by Susan Itell | Oct 3, 2018 | 3-D Projects, Christmas, Uncategorized |
 HHD (Happy Hump Day) to you from beautiful Kiawah Island, South Carolina! I am having a wonderful time away with some amazing women and I just needed to sneak to give you a smile of a post!
I have a super FUN one for you today that will bring a smile to your face and also give you some inspiration to get ahead of the game with a clever way to give the gift that is always….so well received, a gift card…check or good old fashion cash!
We all know that everyone has their own likes and dislikes and a gift card is always a popular option for many so the recipient can pick what they want! Isn’t it amazing that you can get a gift card for just about anything!
I know that one thing that we all like to do is to find clever ways to give these little gift card of love and today I think that I have NAILED IT for you as this is so clean and simple and one that you can use for all times of the year…simple – just change up the sentiment and the paper….POOF – a fun card!
I am excited to add this design that I am sharing with you today to my ever growing ways to showcase a simple gift card, a check or cash! Let’s dive in…cause’ I am using something from the annual catalog that came out 2 years ago (using that STASH again!) and new bundle from the Holiday Catalog that is a sleeper in my simple eyes but honestly one that you simply cannot overlook as it is one of those “practical ones” that always perk me up for its versatility!
Look below, super cute…right!?!? We are working from the Nothing Sweeter Bundle and the Pocketful of Sunshine Stamp and matching framelits. I will share with you some tips and tricks that make this a fun and easy project to whip up! This would be one for the masses!

I know that you have hear many times that when you purchase a bundle you will save an instant 10% and there are times that I communicate to you that I just buy one piece of an offering but for this one….BUY THE BUNDLE as this is bundle is a keeper as it goes not only for the Holidays…but it will clearly work for Valentines Day and also Birthdays! You know….it is fun to think out of the box and I am excited to continue to bring you more posts using this bundle!

The other fun piece to this project is using the Pocketful of Sunshine Stamp Set and the matching framelits…..This is NOT priced as a bundle now (it used to be when it first came out)…. so here you can see that this is why it is the best bang for your buck to purchase bundles when Stampin’ Up! offers them.
This again is one that I would purchase the stamp set as well as the framelits as it is a very unique and super clever offering. I have a super important tip for you with these framelits!


This is just an A-2 card out of Thick Whisper White…..something I always do as I am a big fan of a solid card and then I paced a 4 1/4″ X 5 1/2″ piece of Night of Navy to set the backdrop of todays card!
I am just MAD ABOUT PLAIDS and this gem came from the Holiday DSP from the Annual Catalog, Under the Mistletoe. I knew that the minute I saw this DSP offering it was going to be a favorite of mine and it still is…even after the debut of the Holiday. To me, there is nothing more fun and festive than a good and bold plaid.


Here are the TIPS I have for you….enjoy and please let me know how you like this!
- When you cute your plaid DSP…try to balance the white part on the far right and the far left….I know that this might not seem like a big deal to you but trust me, it balances the eye to make the overall plaid more pleasing.
- Here is one that might surprise you…..used VERSAMARK to stamp the stitches as I just love the tone on tone effect. There are time that I use the same color of ink to do the stamping but I honestly I usually prefer the versamark!
- Use tear and tape to the edges of pocket as this will give the strongest hold!
- Check out the stitches on the Christmas Tree….this an embossed stitch effect and peek again at the image of the framelits that there are also longer rig-rack image and a scalloped….this is just another reason that I adore this bundle!
- Now to the most important tip to using this Bundle….lining up the photopolymer pocket stamp to the framelits for a PERFECT match up each and every time! Watch this video that Mary Fish did as she NAILED IT for a simple and to the point way of lining it up!
- I did not want to do a stark white star….as I did it to be a bit more subtle so I put my thinking cap and POOF – the Twinkle Builder Punch and the “white” of the plaid was to me…..a great option!

OK….there you go and I hope that you enjoy! This is a smile maker for me and I hope that it sparked some interest to you! I will be back late on Friday (hopefully) and please remember to take full advantage of the DEAL that Stampin’ Up! has for us just until the 7th! CLICK HERE to grab a deal of the basics!

by Susan Itell | Dec 15, 2017 | 3-D Projects, Christmas, Uncategorized |

Good Morning! How we all doing? The calendar is telling us that Christmas is just 10 days away! If you are like me, when you see the 15th….it becomes reality – the hour glass has turned.
As I look at my house with “stuff” here and there I am proud that I am not stressing about the “what still needs to be done” scenario that we often put on ourselves….as on Tuesday my kitchen counter was lined up with Reindeer Tags waiting for their noses to dry and when John came into the kitchen he heard a quick, “Don’t lay anything on the Reindeers”….and then I heard a laugh from him!
I have a bunch of pictures for you today and I hope that I am inspiring you to find some time and just have fun with products that I know you have stashed…that is what is BEST about making tags…you get the best of both worlds…a great finished product and you use up odds and ends that you have!
The tag to the right has the retired wooden snowflakes….I found a package of them and the lightbulb went off….not only did I say USE THEM UP but I was happy with the simplicity of using them – trust me….do a “search and rescue of your stash”….you will be amazed at what you find!
This year I decided to go a bit whimsical with tags as truth be told I wanted to get to know the Stampin’ Blends better so how and what is the best way to accomplish that?
Simple….here is the secret – PRACTICE!
Not only did I have fun but it was a learning process and in the end…I had a bunch of tags completed and I learned a bunch! Am I the best at it…NOPE….Did I learn along the way….YEP…I just kept trying a different “touch”…a different “color”…a different “stroke”…I really do not know what I am doing but I just kept practicing and in the end – I had a ton of adorable tags!
At the end of the post today I will share with you my simple formula in making tags…remember, tags can be so many different sizes and shapes. I just tend to stick with one style and let the production line roll!
In the below picture you can see that I colored the reindeer with (2) different main bases for his body. The one on the left the main color is the Ivory Marker and the one on the right is the Light Crumb Cake Marker. I ended up liking the left one better as I preferred the “red – lighter” cast the end result gave. Again, just exploring and practicing….the name of the game!

I shared with you before that I think that this bundle, Seasonal Chums is a keeper one. It is designed with the “back” of the image as well but I just “snipped” it to make it for a tag. Don’t forget – this bundle IS being carried over but it will NOT be in a BUNDLE FORM so if you do not have it….I would SWOOP it up to save the 10% bundle discount.
Just look at these images…true classics and the design of this set is just wonderful! I think that we often forget (I know that I do) to use the other die cut images that are in the die cuts…there are some super shapes that would be great “fillers” for projects!

Here is a super close up picture for you……I truly have no clue what I am doing but I do know one thing….it was FUN! I added a wee bit of Pink to the inside of the ears and cheeks…a quick and easy touch that I do think makes him have character!
What did I do with the nose? Well….I used the Light Cherry Cobbler Blends but then I put some glossy accents over top. I am sure that many of you still have it in your stash from when Stampin’ Up! sold it but I have also linked it for you if not. It is not only a great “glossy shine” it also can be used as an adhesive….(You also can find it in Michaels….Hobby Lobby etc…)

Let’s peek at the adorable snowmen….did you smile? I hope so as they make me smile each time I see them. Let me tell you, these were super fun to color. Remember, NO RULES on what is the right way or wrong way. I just kept picking up markers and went to town….so rewarding and relaxing.
Here is a tip for these little guys…..I used the light Pool Party just around the edge of the snowmen and then used my color lifter to soften the edges…..this gives the little guy a sense of “roundness” and when I put him against the DSP that has Pool Party in it…..(from the Coffee Cafe Collection) it just POPPED!

Pretty in Pink is this little guy. You will see at the end of the post that I used Kraft Wrapping Paper with a simple Red bow for many of my gift wrapping. When it is all said and done….who cares about the colors as after all they are just TAGS…and TAGS are meant to be a “one and done” type of thing….this is why I chose TAGS to be my practice guinea pigs!
Here is a great place to buy fun wrapping paper….Michaels….yep – they have some great papers in bins for just $1.50 each…that is my “stock up” place of choice as not only is it a great price…the selection is usually good (very plain, clean & simple….just like I like it) and the quality to wrap it is super!

For these tags…this is how I rolled…
- I cut Thick Whisper White to 2″ X 5″ and then used the Banner Triple Punch for the decorative end
- I stamped the images on scraps if paper….cut them out and colored them with the Blends. Make sure that you use the Memento Ink with the Blends….
- I cut the DSP a wee bit larger than the image….sometimes it was 2″ and sometimes it was 2 1/4″….just have a little bit on each end to make the image POP and then mat it with a solid piece of cardstock that is a wee bit bigger than the DSP.
- I popped the images up with Foam Adhesive Strips….I found this to be a perfect choice. I loved that I could “bend” the adhesive but I really….really liked only having to peel off on release paper.
Where did the sentiments come from? Well….“Merry and Bright” was from the November Paper Pumpkin and the “happy holidays” was from a Simon Says Stamp that I have. You know me…..I do love my sentiments and I am always on the lookout for the perfect fit and font for my needs.
The moral to this tag story is…just have fun in creating and making them. Use what you have….tailor it to the color scheme of your papers and ribbons and use up what you have. It truly is as simple as that. As I am finishing them up…I toss them in a container so they are all in one spot….this way I am always “armed and ready for wrapping duty” at anytime.

As you know me as being “SIMPLE SUSAN” you can see from the below picture how I roll for the holidays! I tend to be a Kraft Paper or a simple and fun Polka Dot person with a BIG WIDE BOW….and to me that is both FUN and DONE!
Here is another idea/tip….tags make a fabulous gift to give. I have put tags in a Mason Jar with a spool of Bakers Twine and a pair of Paper Snips….now that is what I call a HOME RUN…not only a great gift but a super practical one!

Happy Weekend to all and if you are starting to travel, please be careful. This is such a busy time of the year and I know that many of my friends “peeps” are rolling in from Colleges now. My oldest peep Will….is leaving today after school (he is a teacher) and spending the holiday traveling Spain…..true I am a bit sad that he will not be home but I am thrilled that he has the time off and ability to see a different country.
I do hope that you can find some time to give making handmade tags a whirl….it is a stress buster as if you are creating….you are having some “me time” and we all love our crafting time!!!
So…what do you think???? Do these tags perk your day up!?!? I sure do hope so….now go make it a FABULOUS day!
by Susan Itell | Dec 11, 2017 | 3-D Projects, Christmas |

\
Happy Monday again…I just had to pop back on and post these cuties for you as I honestly had them ready to go for today…this week I am showing you practical ways that make your gift giving that much more special and easier!
(click on the banner to go to the online store)

With today being a FREE SHIPPING DAY for all orders…BIG or SMALL….it is a great time to grab those staples and also the bundles that will be going bye-bye! (a WIN-WIN…..saving 10% on the bundle PLUS another 10% on shipping)
You can click here to see the post that I did last year for these “check holders” and also click here when I did another variation but in a nutshell…these are super cute and super fun to whip up! (darn, a adore those mice)
I always have calls for these as there are still many that would prefer to write an old fashion check than give a gift card. You will see that I have 3 sizes….why? – I had a customer ask for one that was still cute and decorative but she wanted to enclose it in a Christmas Card…that is where the idea of the small one came from!

Here is a quick reference for you. If I were you….I would jot it down and put it somewhere that you go to often because it is little things like this that we can use all year long! I just adore practical ways of “gifting” but still make it super special!
- Start with a 7″ X 7″ Square, score (I like to use the Score Board as it gives a nice and deep impression) at 1 1/4″ and 4 1/4″ and using the bone folder, crease well.
- Find the center of your check holder (3 1/2″) and using a small circle punch, pop a 1/2 circle out so it is easier to pull the check out
- Add tear n tape on the side edges to adhere
- Make the belly band – the Solid piece is 6 3/4″ X 1 1/4″ and then the DSP is 6 3/4″ X 1″. I just wrap it around and then take the bone folder to get a good crease, again use a wee bit of tear n tape to hold close.
- The DSP….for the standard checks….the DSP is 1 1/2″ X 6 3/4″ (bottom one) and the (top one) is 1″ X 6 3/4″ and for “shortie” the DSP on the (bottom one) is 1 1/2″ X 3 1/2″ and 1″ X 3 1/2″ for the (top one)

Remember…do not make the belly band too tight that it is difficult to get on and off… The sky is the limit as to what you can add to jazz up the fronts….you know the main goal…JUST HAVE FUN!
This is a fun project to look through your stash and just go to town. The end result is always a work of art that you will be proud of! I find this process to be fun!

For the “short guys”…..I followed the same formula as above but I just made base 3 3/4″ X 7″ before I scored it like above. They are cute aren’t they? Even if they are “shorties” – they are perfect to fold a check in half!
You can see that the sky is the limit for decorating but hear me out…this is a great way to use your odd sizes of DSP… you can see that I used all sorts of different stamps, used the Stampin’ Blends….just had FUN!
I shared with you last week that the Seasonal Chums IS being carried over but IT IS NOT a bundle after January 2nd….so this is one that I would hop on….it is just adorable and again, Stampin’ Up! did a fantastic job in the design!

I just went to town and had fun putting different paper behind the Crumb Cake Mittens…I am super sad that this bundle, Smitten Mitten is leaving us….as it is just too darn tootin’ cute…..click here to see a post I did on that from Friday! It is sooooooo fun and festive!
In the above photo…can you see that I placed RED teeny tiny rhinestones on the center of the mitten and also on the Elves Hat and Shoes? Easy and quick as I just colored with a red sharpie! You can use the Stampin’ Blends to color them as well….but I thought that the Cherry Cobbler was too dark and I wanted to make sure that you knew that you could use sharpies!
There you go…..I hope that this perked your Monday afternoon up! Remember, free shipping is just through this evening…..call me crazy but I set an alarm to go off at 8:30 tonight as I know me too well….I will get all caught up in watching the Voice and the evening will get away from me…..so this is how I roll….a good old fashion reminder …
I need to stock up on some basics….and FREE SHIPPING makes me skip a beat!


